In this post, we will configure the new API authentication method (Oauth2) required by Microsoft, since the Web Service Access Keys have been deprecated.
Portal Azure
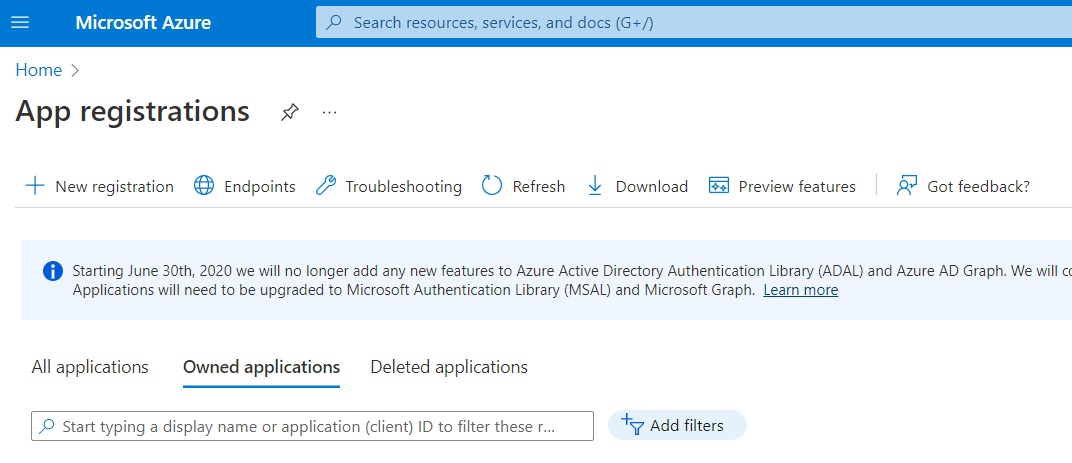
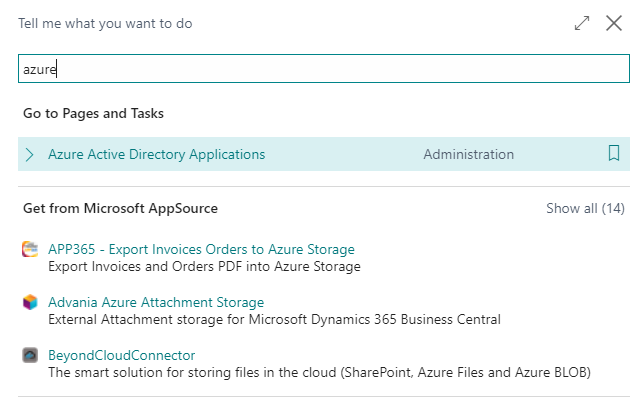
The first thing we must do is go to the Azure portal, and look for App Registrations
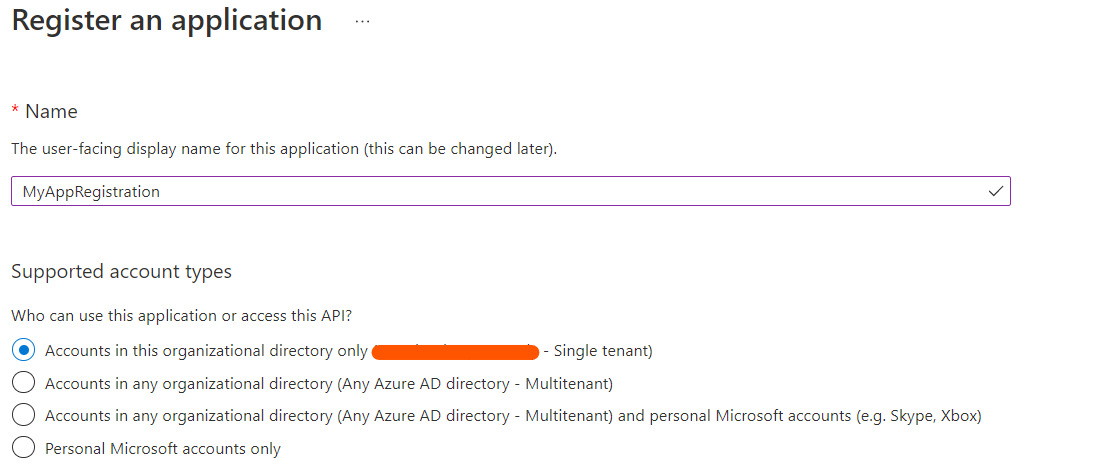
- We click on New Registration and put a name.
2. We fill the Redirect URI field changing the type to web and put the following information: “https://businesscentral.dynamics.com/OAuthLanding.htm“

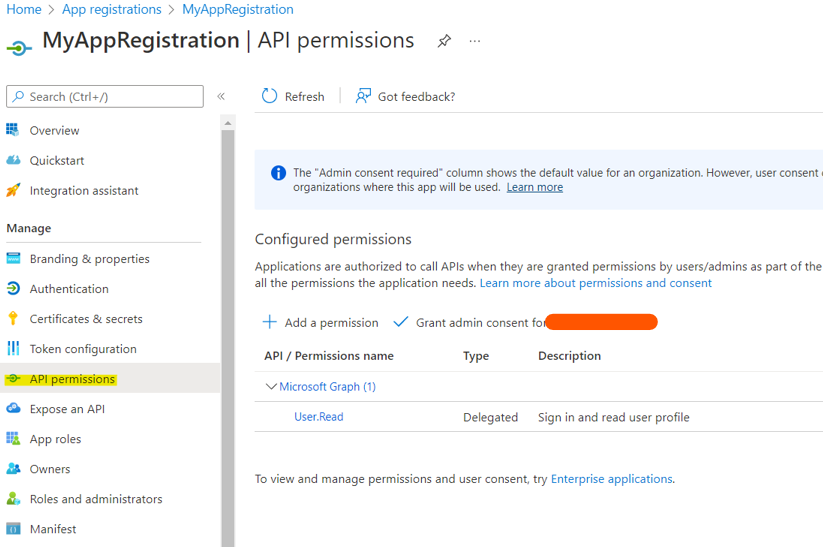
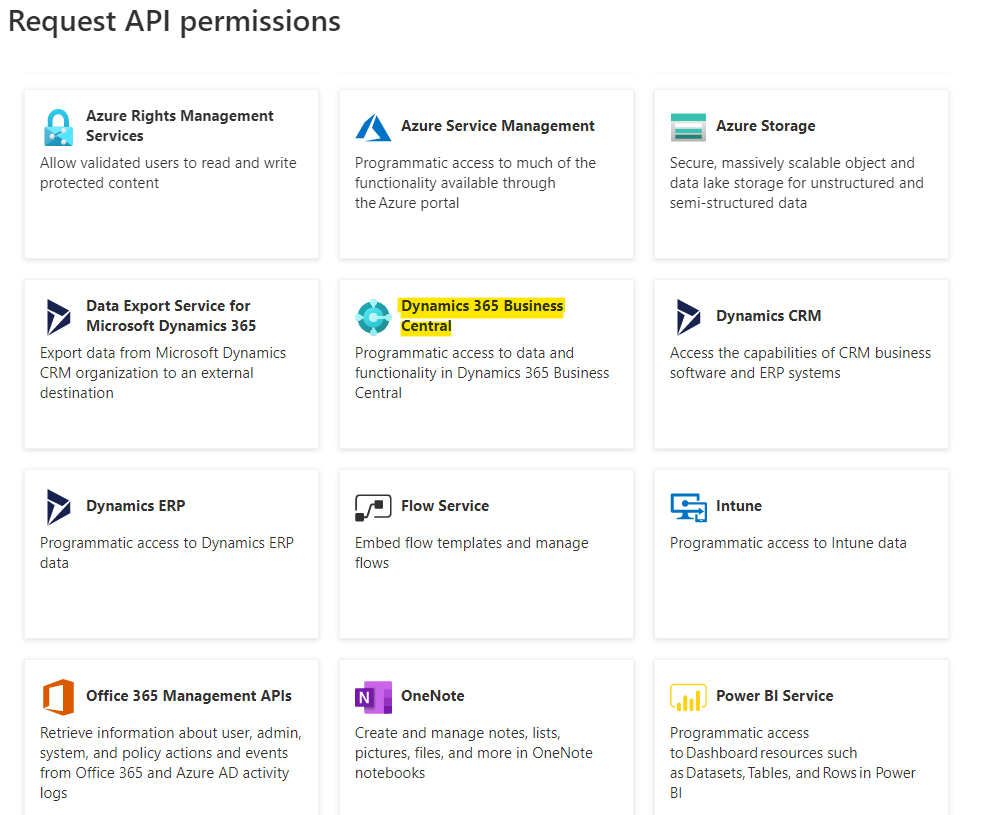
3. Then we click on API Permissions.
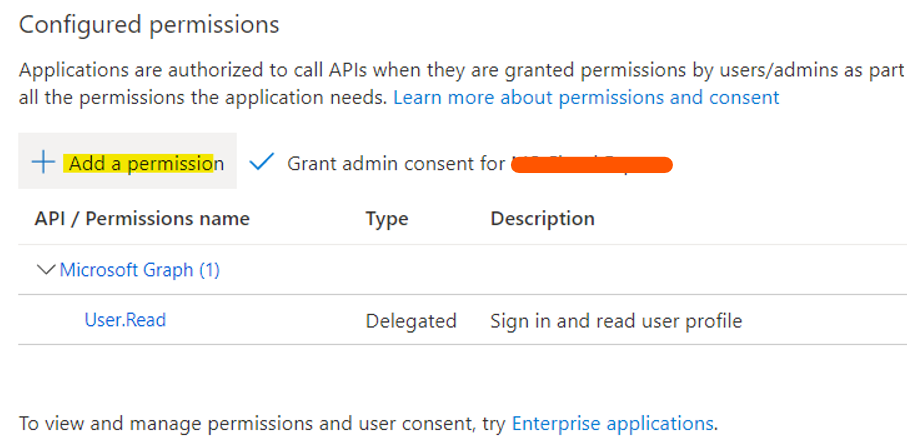
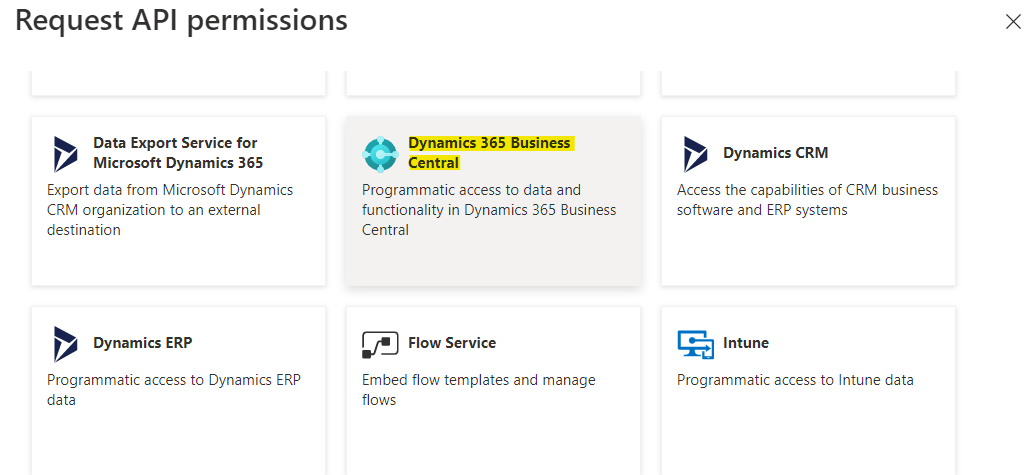
4. We click on Add Permission
5. We are looking for Dynamics 365 Business Central.
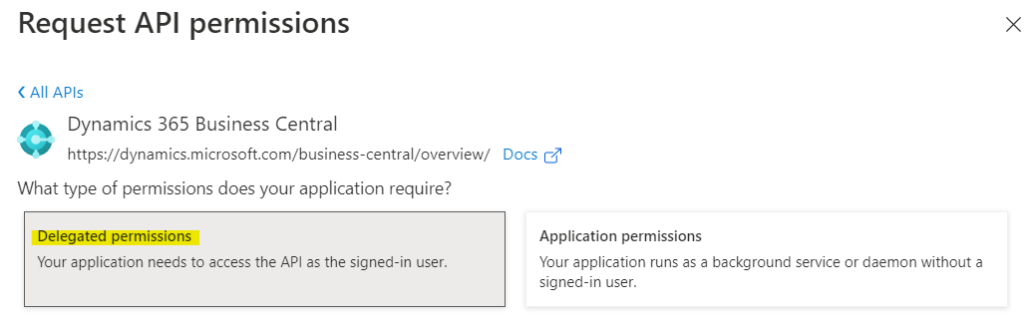
6. We select first, Delegate permissions.
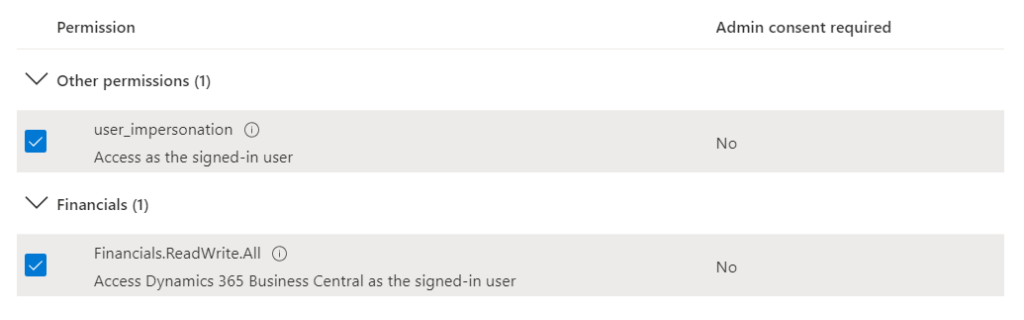
And we select the 2 that appear to us as seen in the following image:
7. We return to click “Add Permissions”
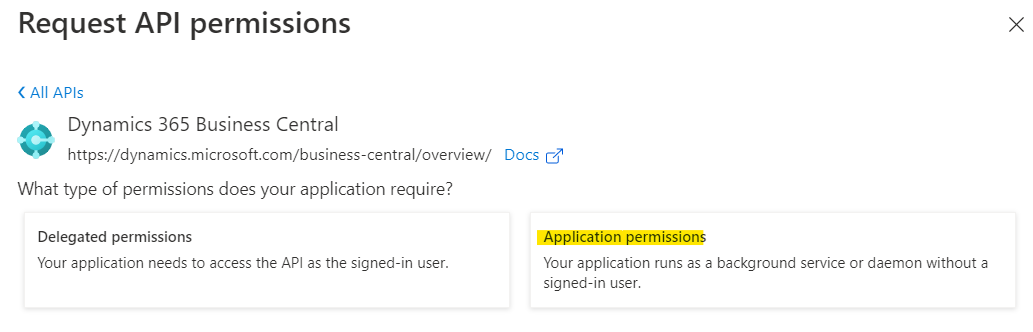
8. We look again for Dynamics 365 Business Central
9. But, this time we select Application Permissions.
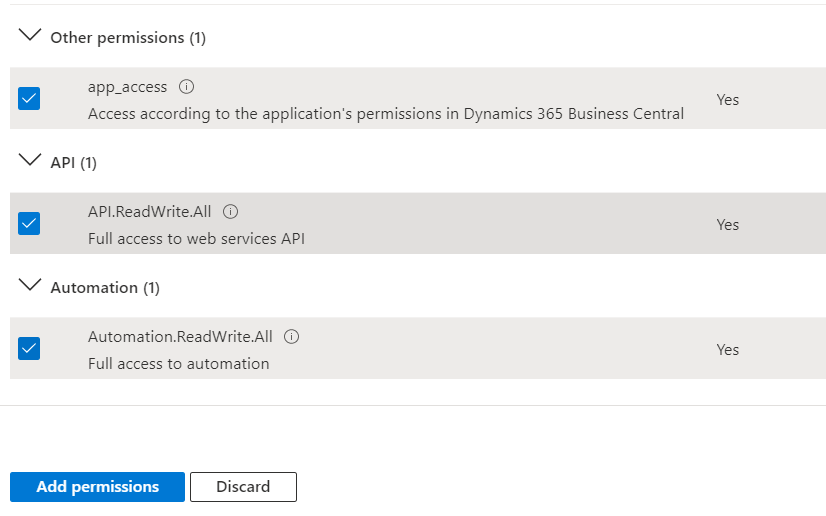
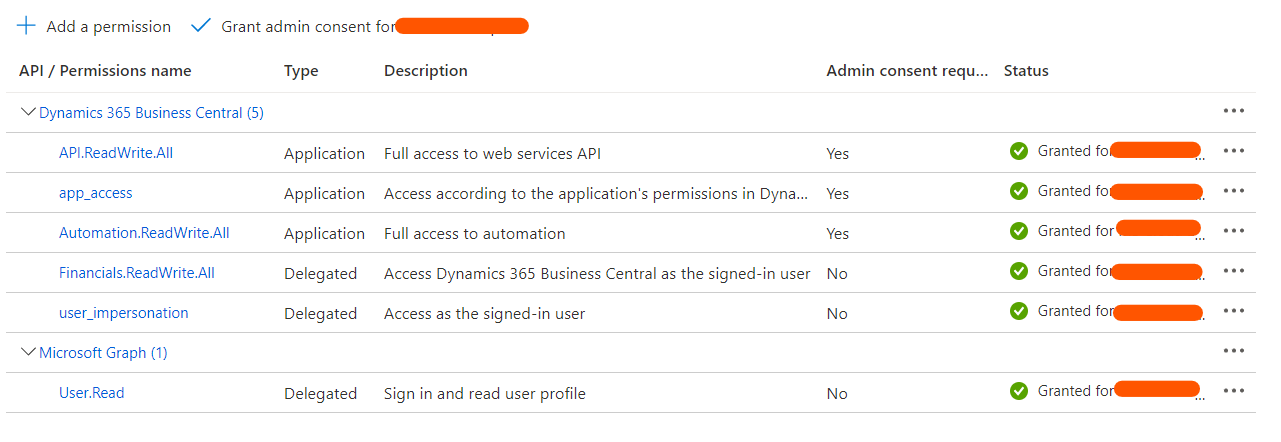
10. And we select all the permissions as they are seen in the next window.
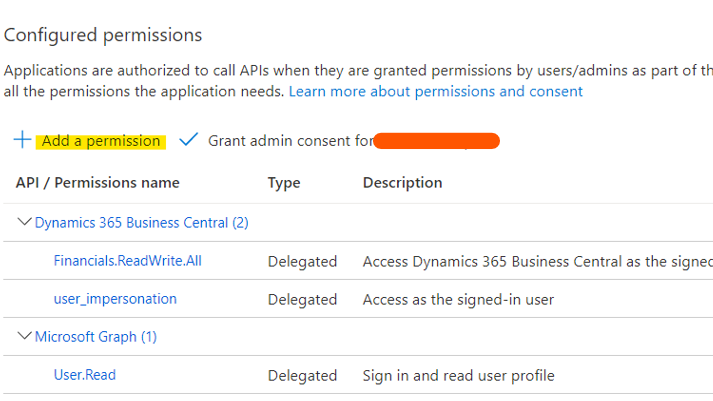
11. Once you have configured the Delegate and Application permission, you must grant permissions.
Note: The user who can grant permissions must be a global administrator user.
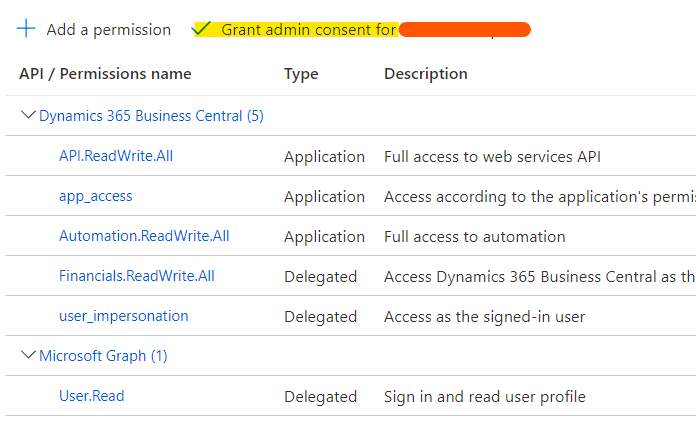
12. We accept the confirmation consent.

And we will see that all permissions will be granted, as seen in the following image:
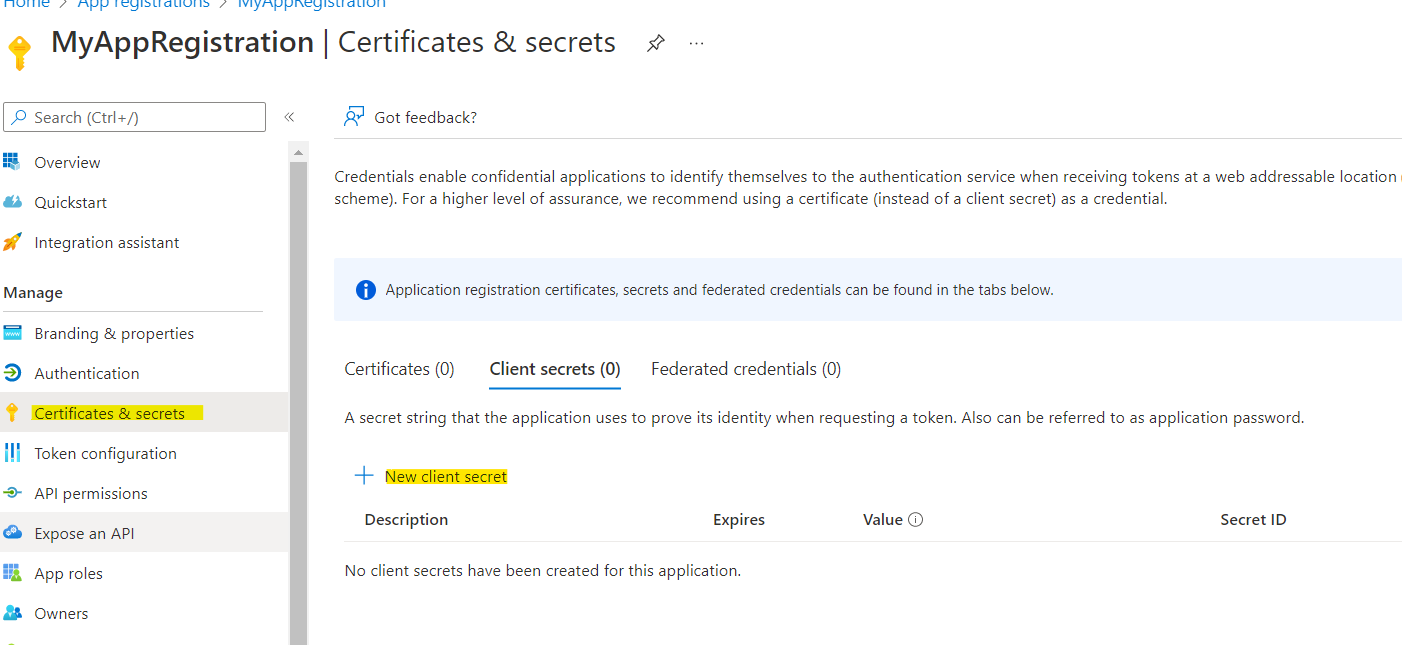
Next, we are going to create a secret key that will be needed.
To do this, click on Certificates and Secrets.
13. And we click on “New Client Secret“
14. We configure a description and the time we want it to be valid.
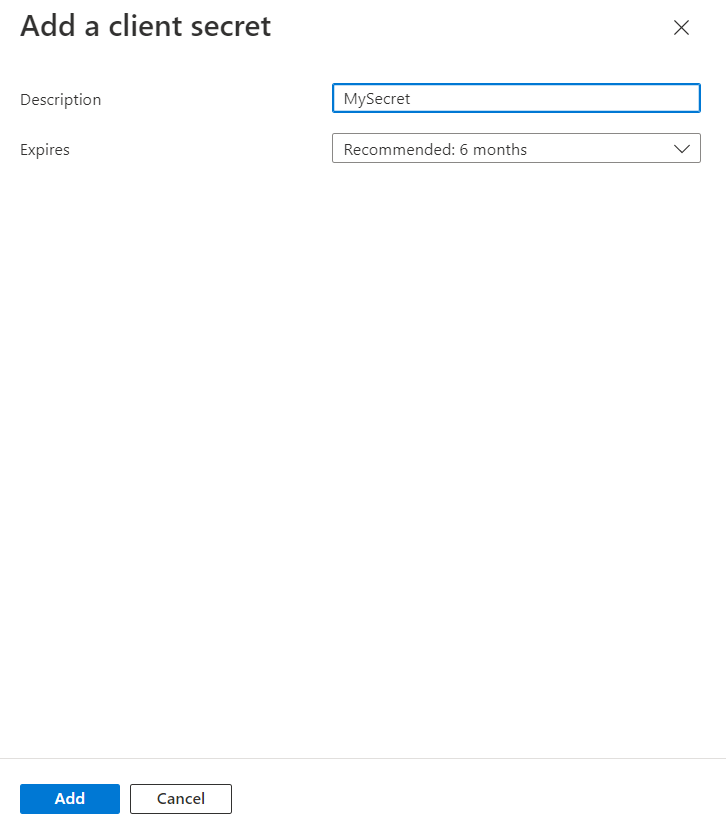
15. Once created, we must copy the value of the secret, since we will use it later.

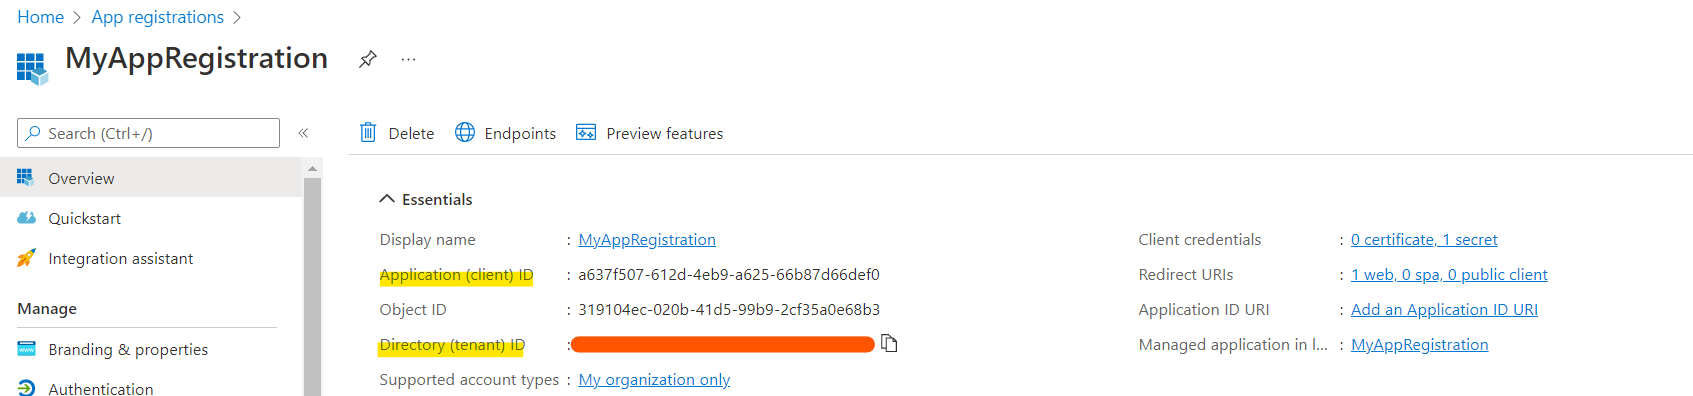
16. Finally, before leaving our portal, we must copy 2 important values.
The Application Client ID and the Tenant ID.
Business Central
- Once we are in Business Central, we look for the magnifying glass and there we write Azure Active Directory
2. Here, we are going to create a new registry that is linked to our Azure APP Registration.
To do this, we click on New
And we fill the Client ID field with the Application Client ID information.
3. In this step, we put a description to our record and most importantly, the permissions we want it to have access to within Business Central.
These permissions cannot be SUPER, but they can be similar to what you see below:
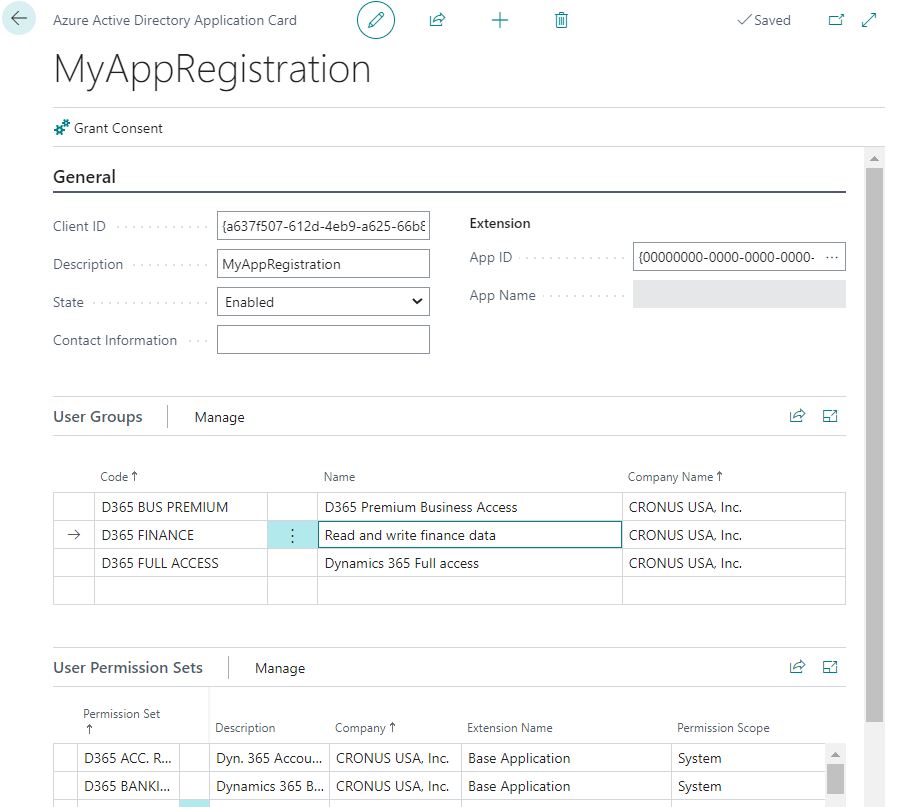
With this we have configured what is necessary in Business Central.
Postman
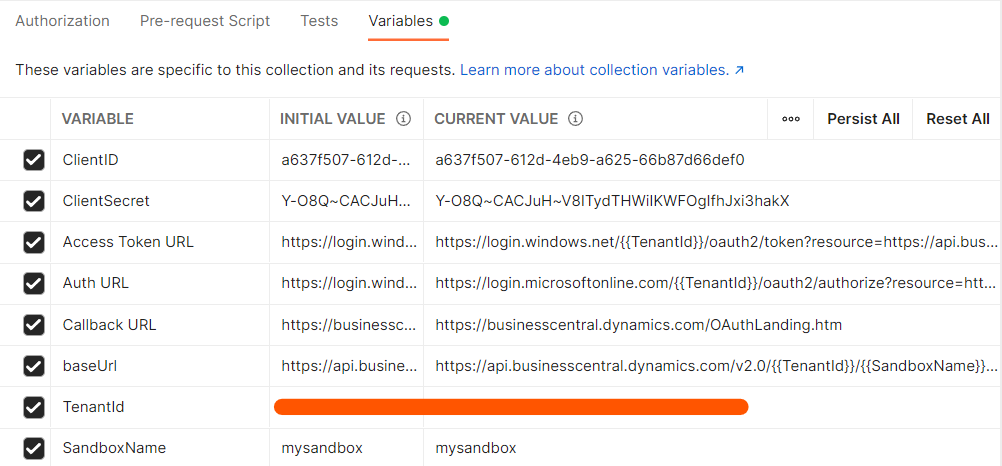
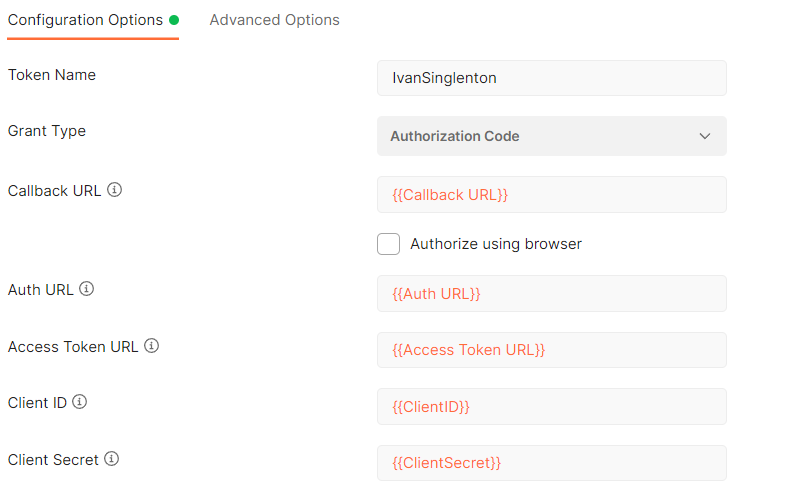
Now, the last step, to test our Oauth2 configuration, we are going to use Postam, which we must first configure the following variables, which left a template for it.
Variables
ClientID: a637f507-612d-4eb9-a625-66b87d66def0
ClientSecret: Y-O8Q~CACJuH~V8ITydTHWiIKWFOgIfhJxi3hakX
Access Token URL: https://login.windows.net/{{TenantId}}/oauth2/token?resource=https://api.businesscentral.dynamics.com
Auth URL: https://login.microsoftonline.com/{{TenantId}}/oauth2/authorize?resource=https://api.businesscentral.dynamics.com
Callback URL: https://businesscentral.dynamics.com/OAuthLanding.htm
baseUrl: https://api.businesscentral.dynamics.com/v2.0/{{TenantId}}/{{SandboxName}}/api/beta
TenantId: yourtenantid
Client ID : Application Client ID.’
ClientSecret: information generated in the azure portal.
If we use postman variables, and configure the above, we would have something similar to what is seen below.
Variables in Postman
URL Request (TEST)
To prove that we actually have a connection with the Business Central, we are going to use this url that lists companies, if the connection is successful we will have all the companies that exist.
{{baseUrl}}/companiesUsing Authorization Oauth 2.0
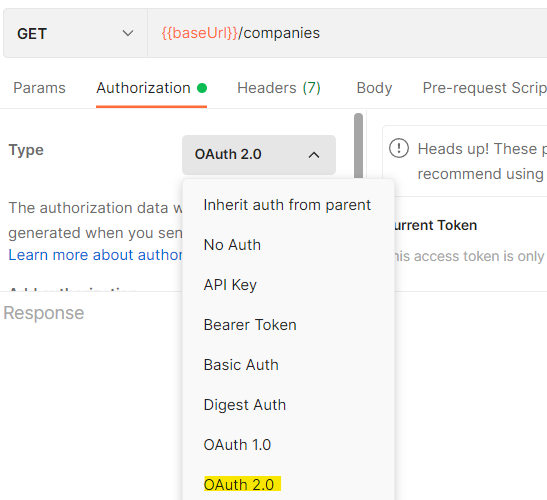
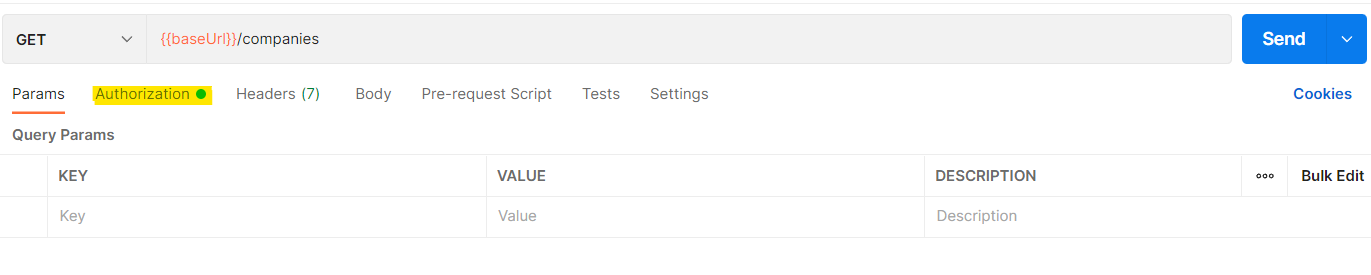
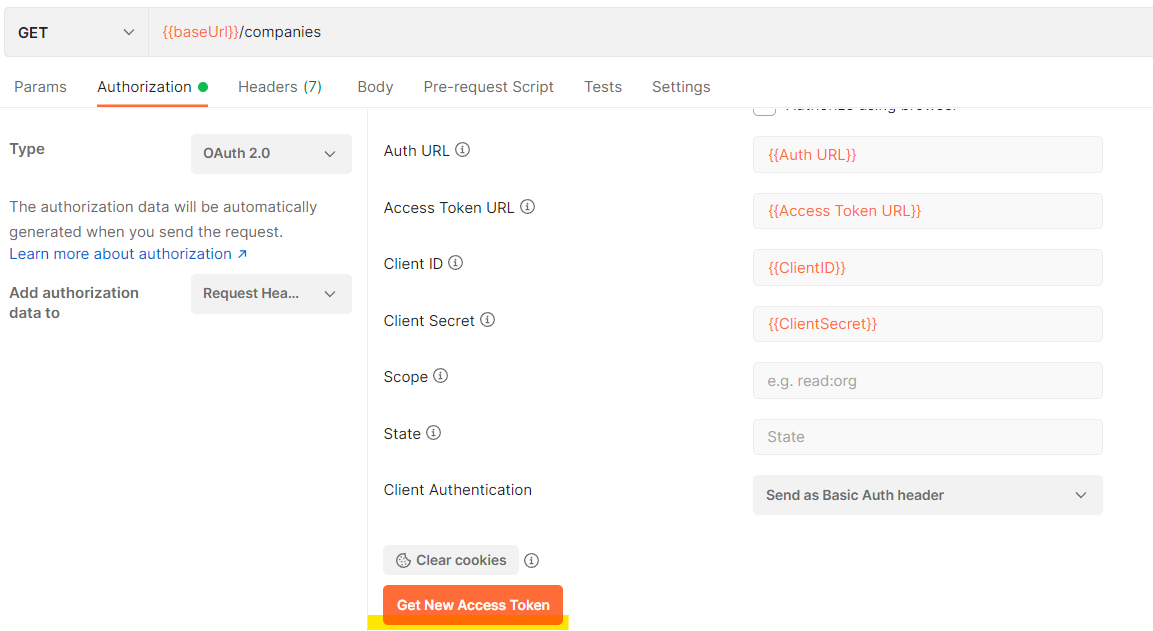
- We click on Authorization and in the Type combobox we select Oauth2
2. Then, we click on authorization
3. we configure all the necessary variables of this authentication method.
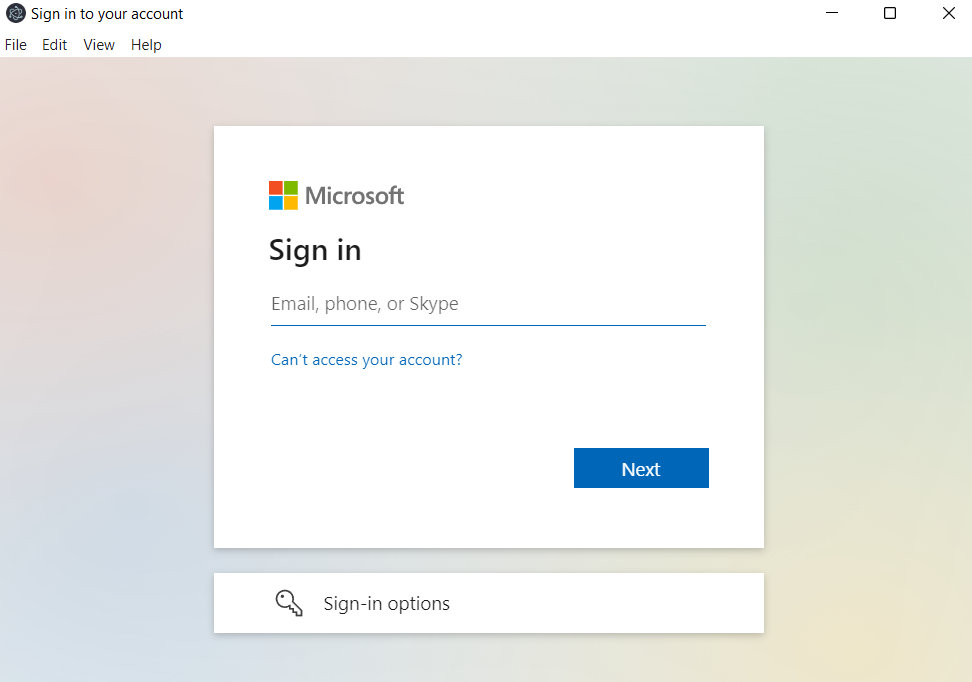
4. Once we have set the previous fields, we must obtain a token, we achieve this by clicking on “Get new access token“
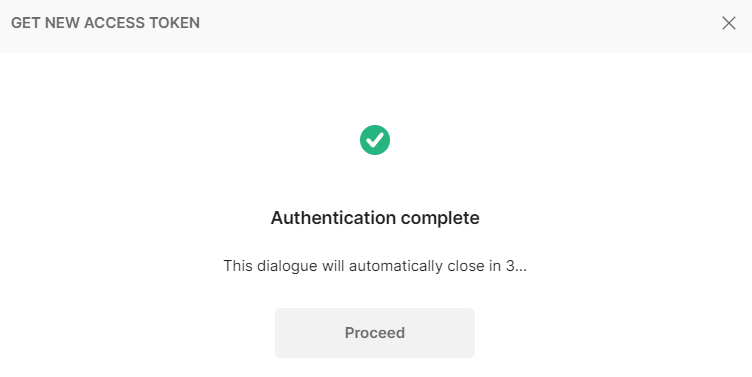
This will bring up an authentication window.
And once our credentials have been entered, we will have a successful confirmation window like the following:
5. Finally, we will do a get to the previously mentioned URL.
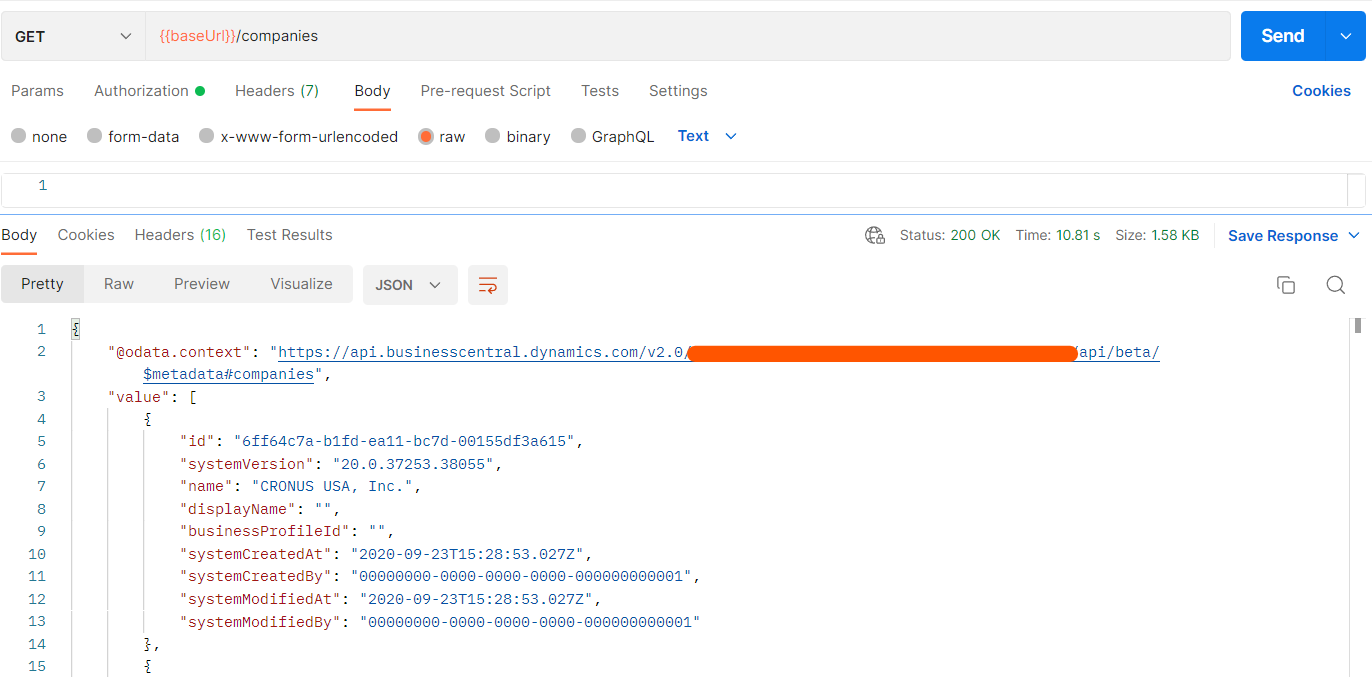
And the response should return a Status 200 OK and the list of companies within our environment.
More information can be found in the official document at the following link.
I hope this has helped you.
Pingback: How to read files via SFTP in Business Central - Ivan Singleton
Pingback: How to Document and Try Out Business Central APIs with Swagger - Ivan Singleton
Pingback: How to use the Query object as an API in Business Central - Ivan Singleton