In this post, I am going to explain how to connect and read a file on an SFTP server and create a record in Business Central automatically through Azure Functions and Power Automate.
Although we will base ourselves on the idea that when creating or modifying a CSV file that contains information on Items in the SFTP server, it will automatically read it and insert each Item in Business Central, this process could easily be adjusted to other scenarios, such as creating Customers, Vendors, Bank Reconciliations, Item Journals, among others.
Additionally, for the development of the Post, I want to share with you a simple way to create an SFTP server in Azure through Store Accounts.
Project Overview
- Demo Video
- How to create an SFTP in Azure
- Web services in Business Central
- Azure Function
- Power Automate
Demo Video
How to create an SFTP in Azure
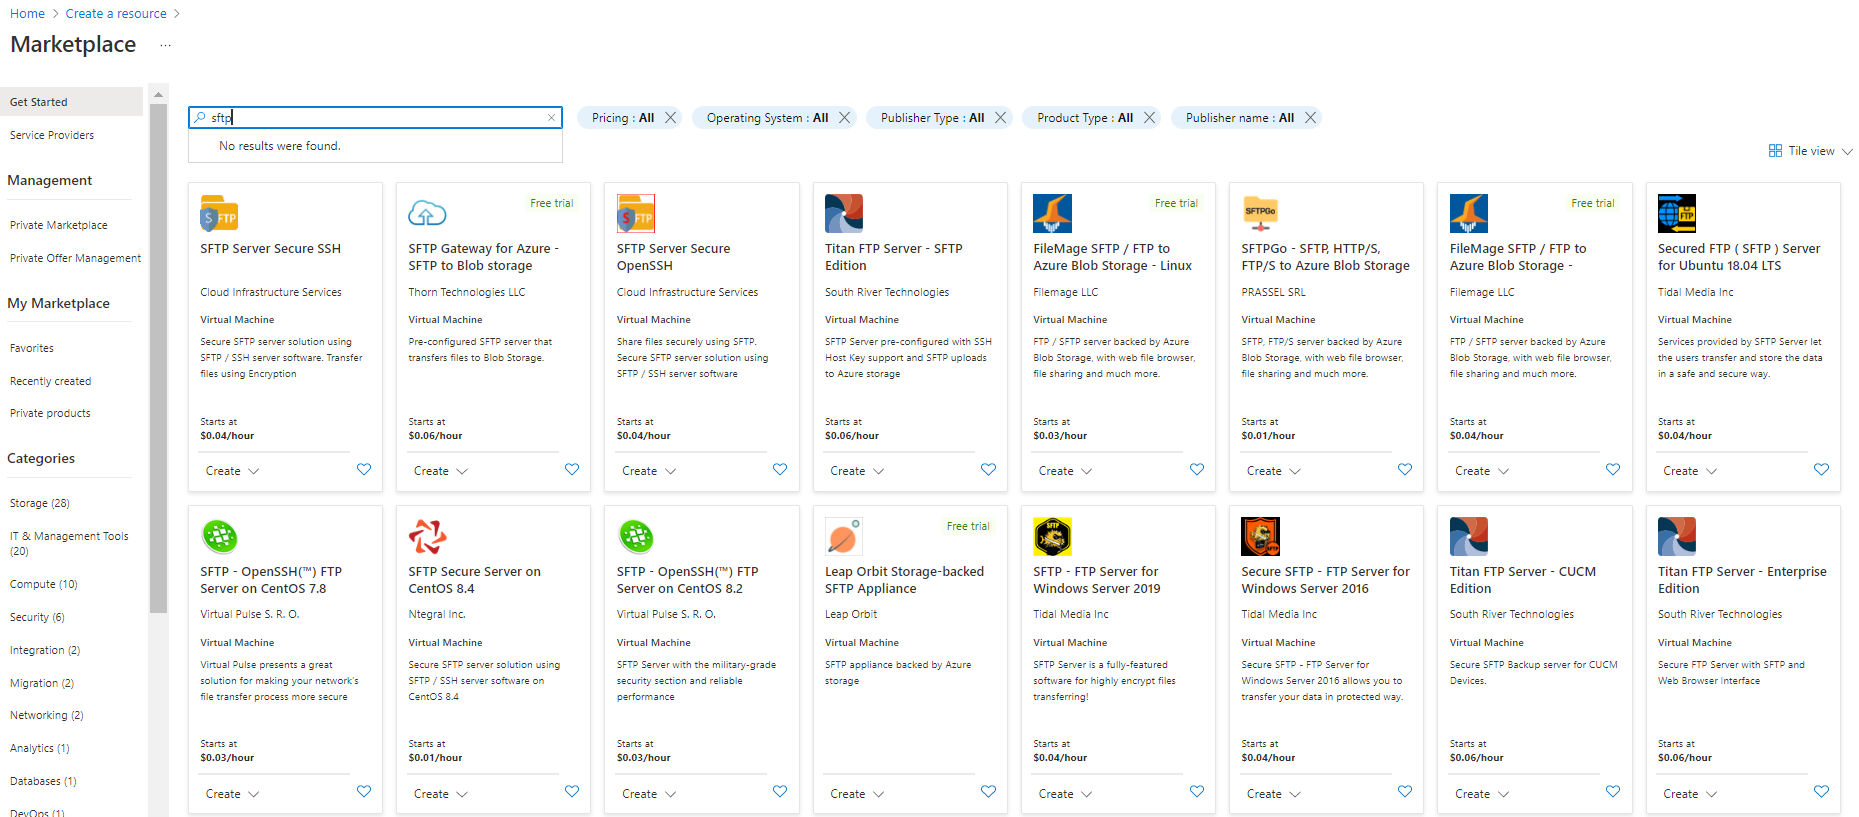
One of the ways to create an SFTP in Azure is through the marketplace, as we can see there are several virtual machines in Linux and others in Windows with everything preconfigured.
But, in this Post, we are going to implement a simpler version that I learned recently, through Storage accounts.
Creating an SFTP in Azure
Next, I will show a small step-by-step of how to create and configure an SFTP using Storage accounts.
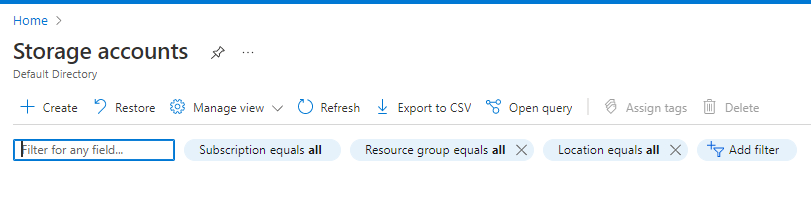
- On the main page, we click on Storage accounts.

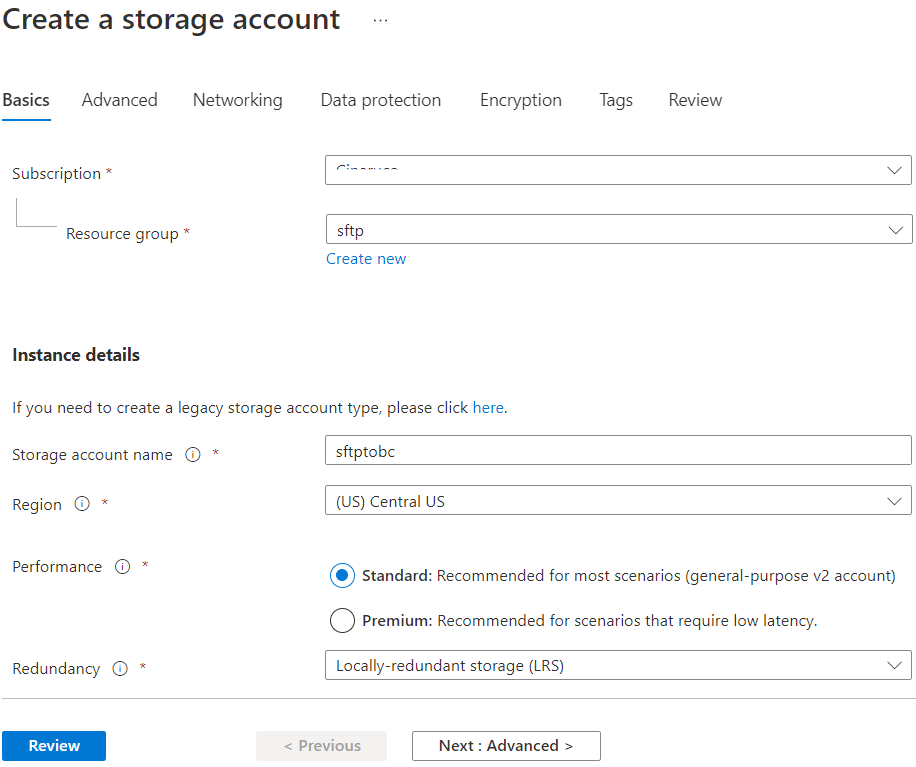
- Then, we click on create
- We fill in the basic information, Resource group, Storage account name, etc.
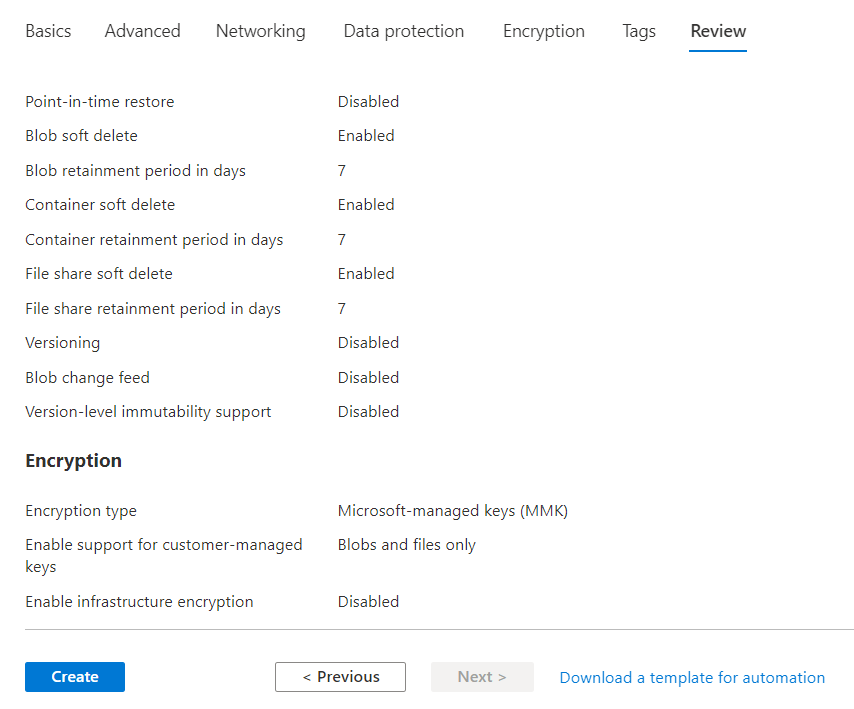
- In advanced, in the Data Lake Storage Gen2 section, we mark the check Enable hierarchical namespace, and in the Blob storage section we mark the check Enable SFTP (preview)
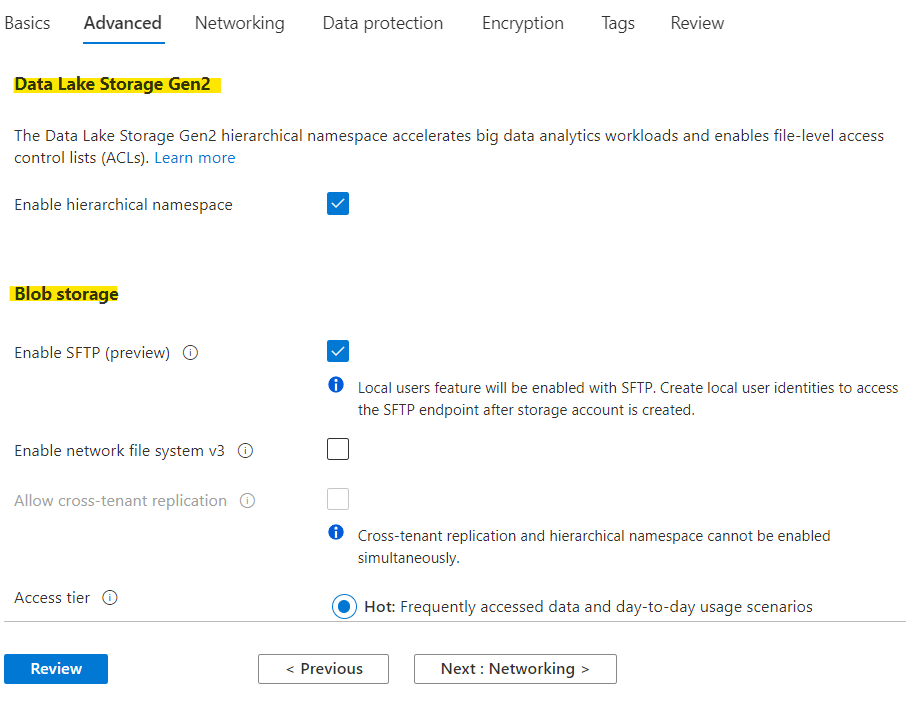
Enable SFTP (preview): Enables the SSH File Transfer Protocol for your storage account that allows users to access blobs via an SFTP endpoint. Local users need to be created before the SFTP endpoint can be accessed. More information
- We click on review and then on create
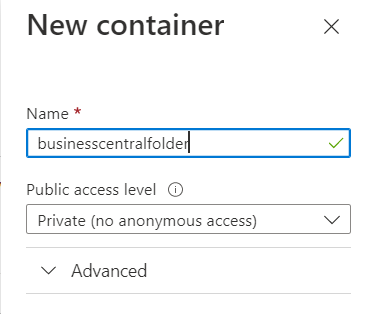
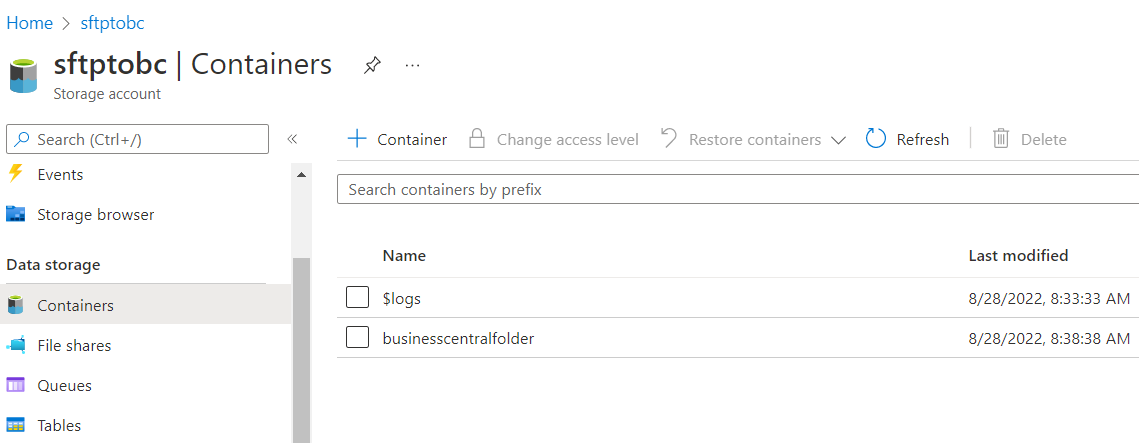
- Now, we go to our newly created resource and click on Containers.

- The containers will represent our folder within the SFTP server, so we are now going to create a Container, by clicking on create.
We will be asked for the Name of the container, and the public access, which we will leave by default in private.
Once created it should look something like the following image
- Now, we go to the Settings|SFTP (preview) section and click on Add local user.
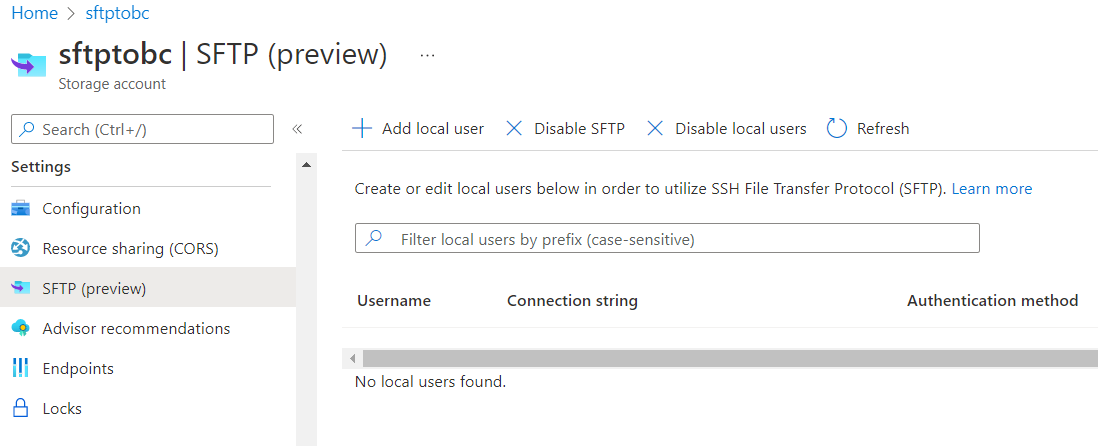
We will be asked for the username, and additionally, we must mark the SSH Password option
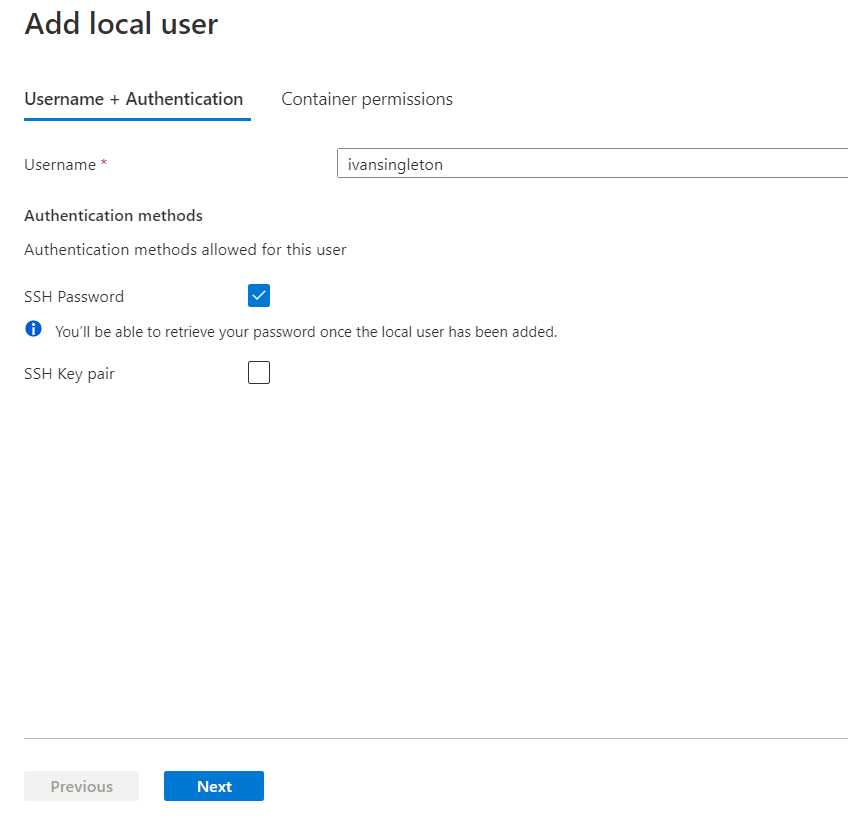
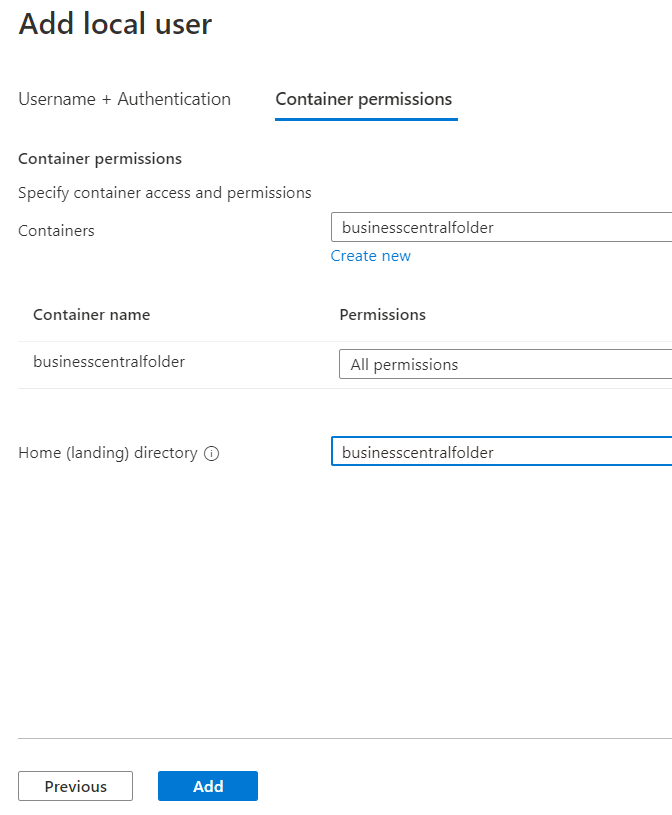
When clicking on next, we must configure which container our user will have access to and what permissions.
Finally, when saving the information, a pop-up window with the password will open. We copy it so we can connect later.
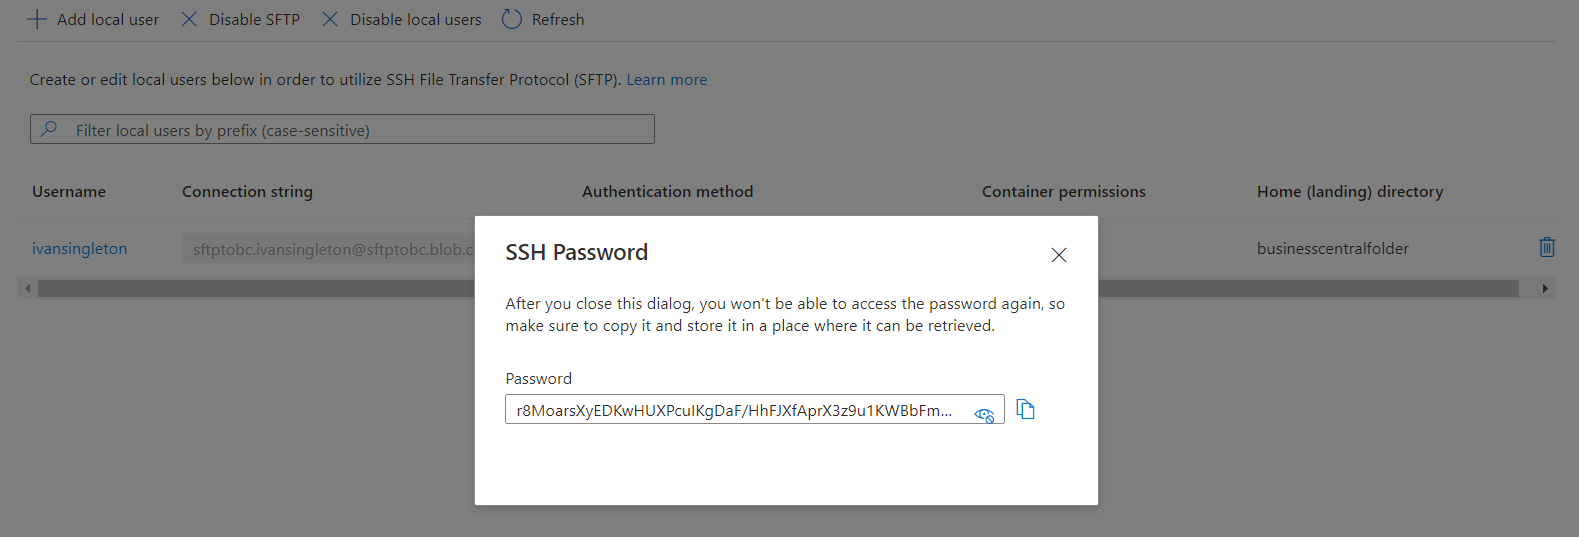
- We copy the SFTP address and username that Azure gives us from the connection string.
Connection String:
sftptobc.ivansingleton@sftptobc.blob.core.windows.net
Username:
sftptobc.ivansingleton
SFTP address:
sftptobc.blob.core.windows.net
Testing SFTP
We will use FileZilla’s SFTP client.
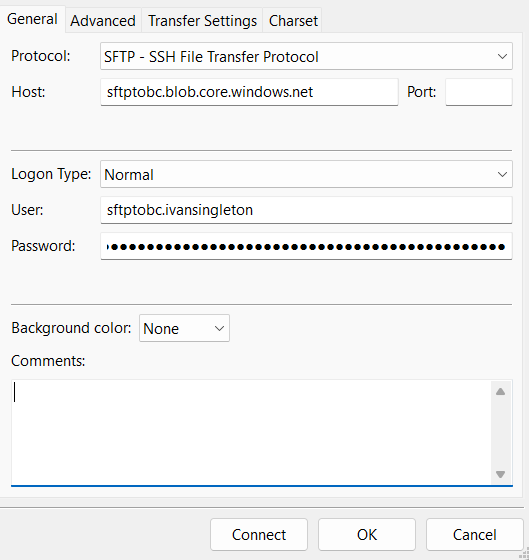
- We click on Open Site Manager.
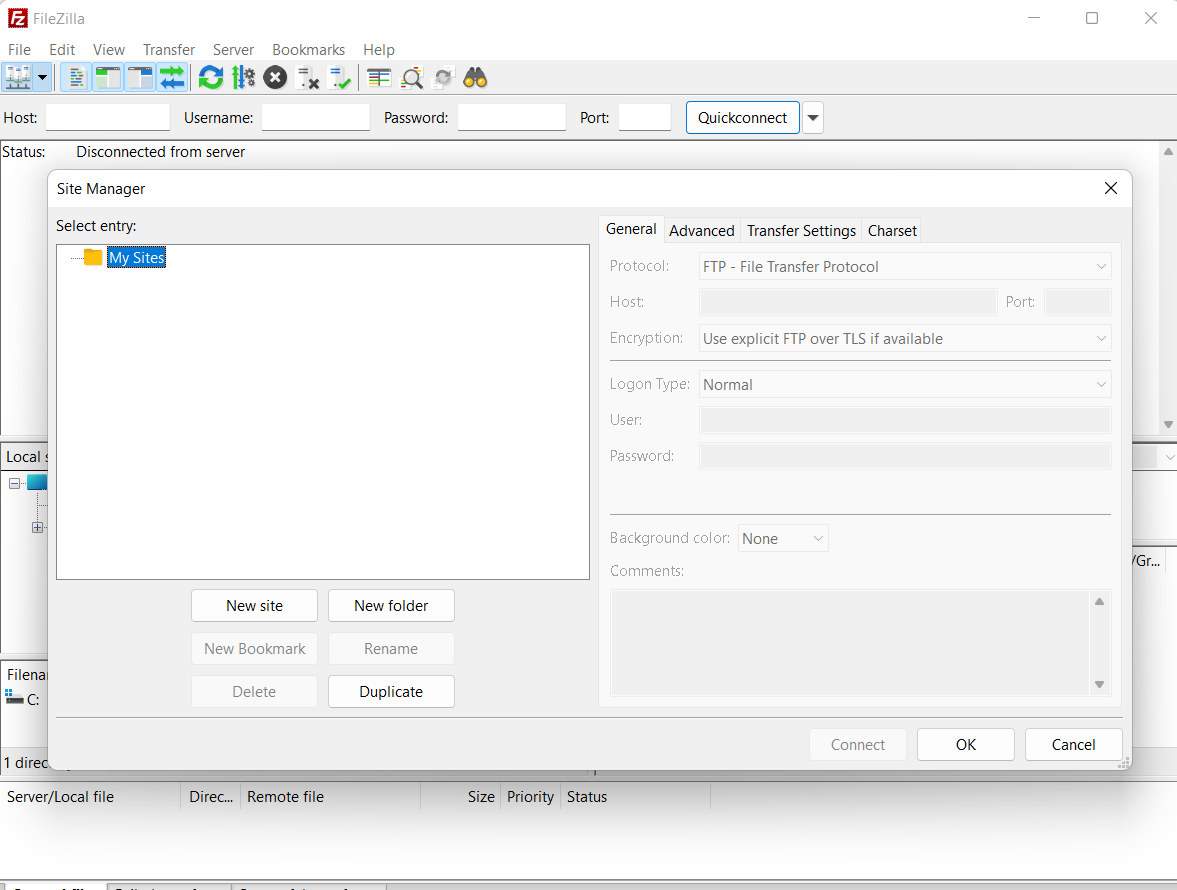
- We fill in the necessary information such as Host, User, and Password.
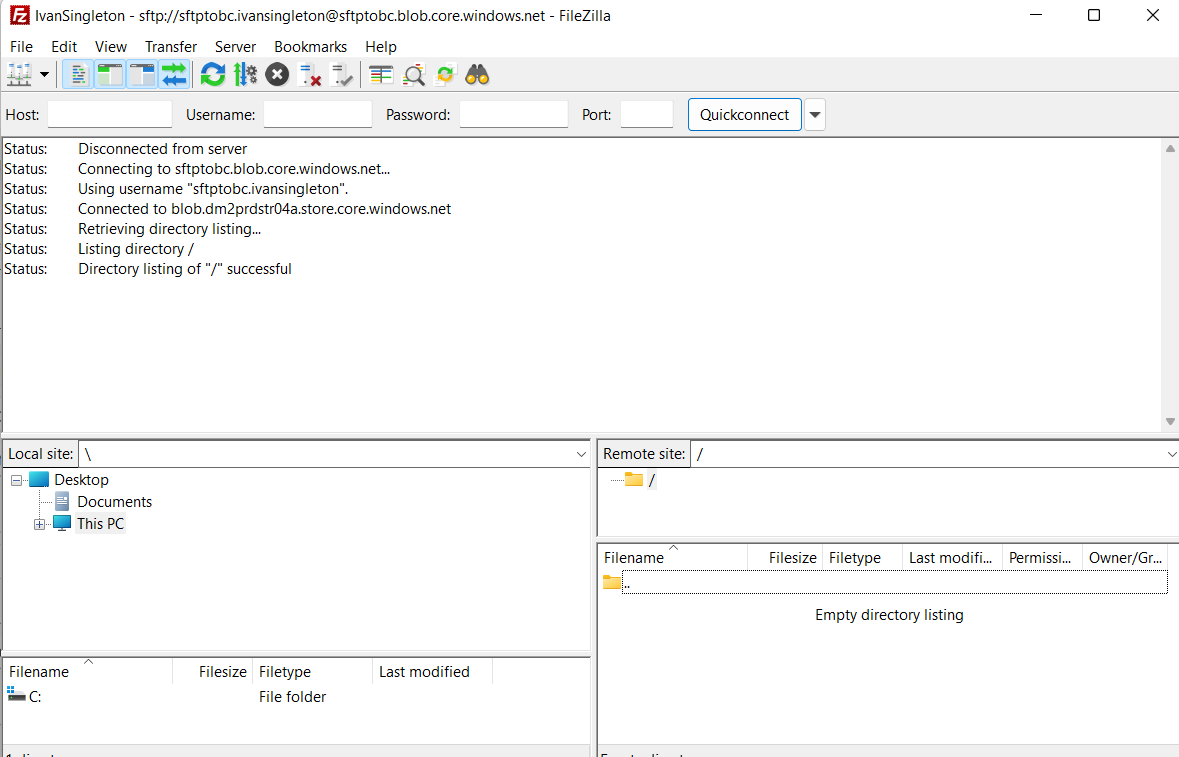
When connecting we will have something similar to the following image.
Test Video
Web services in Business Central
Now, we will create a simple extension in Business Central with a single codeunit, which will allow us to create records with the information from the CSV file from Azure Functions.
Codeunit
This codeunit receives a JSON array as input, deserializes it, and creates records in the Item table.
To call it from the Azure function, we will publish it as a webservice as seen in the following image.

Azure Function
The Azure Function is very important for this project since it will be in charge of the following processes:
- Read the information of the file that is sent from Power Automate.
- Convert the CSV file to JSON.
- Authenticate in Business Central with Oauth2.
- Connect to the previously shown Webservices and insert the information from the file.
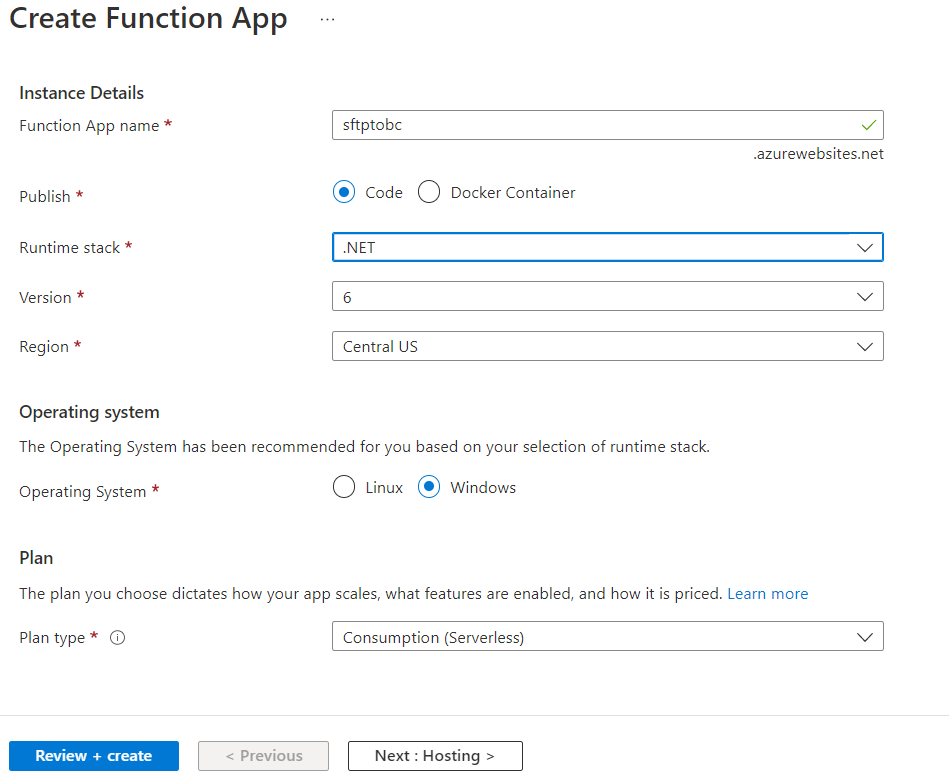
Although you can create an Azure function from Visual Studio, I personally like to create it from the Azure portal.
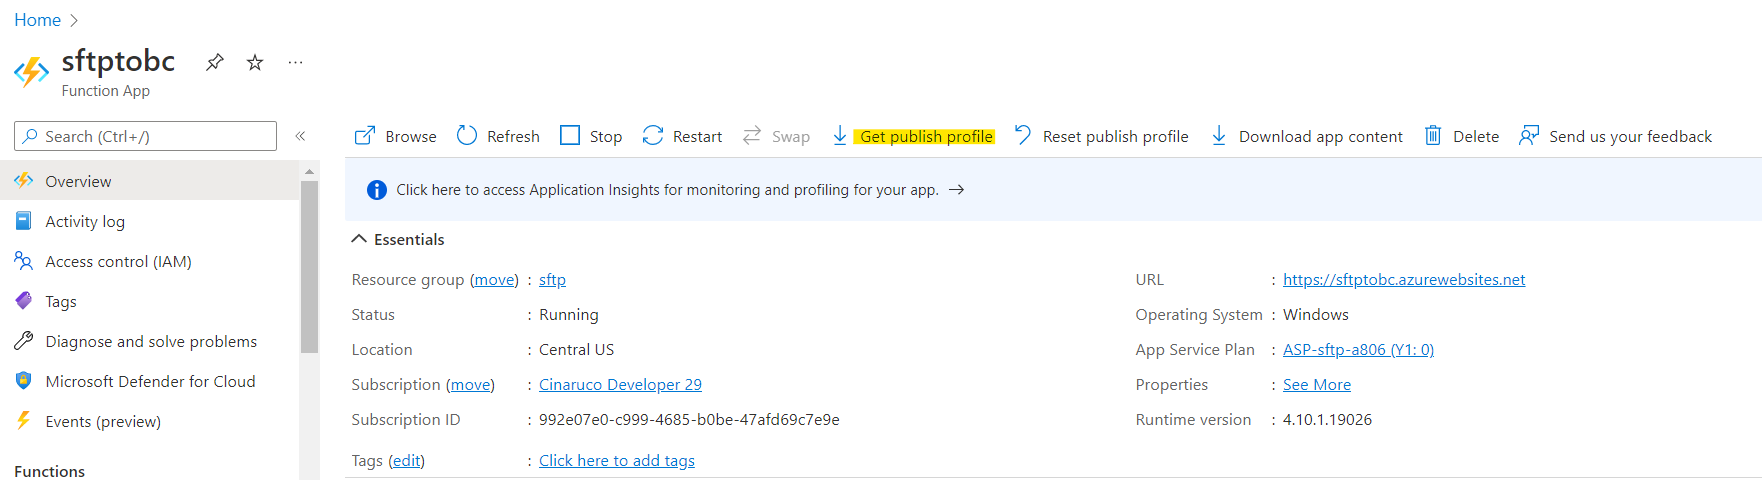
Once created, I get the publish profile and then import it into Visual Studio at publishing time.
The next step is to configure all the connection strings to connect to Business Central through Oauth2.
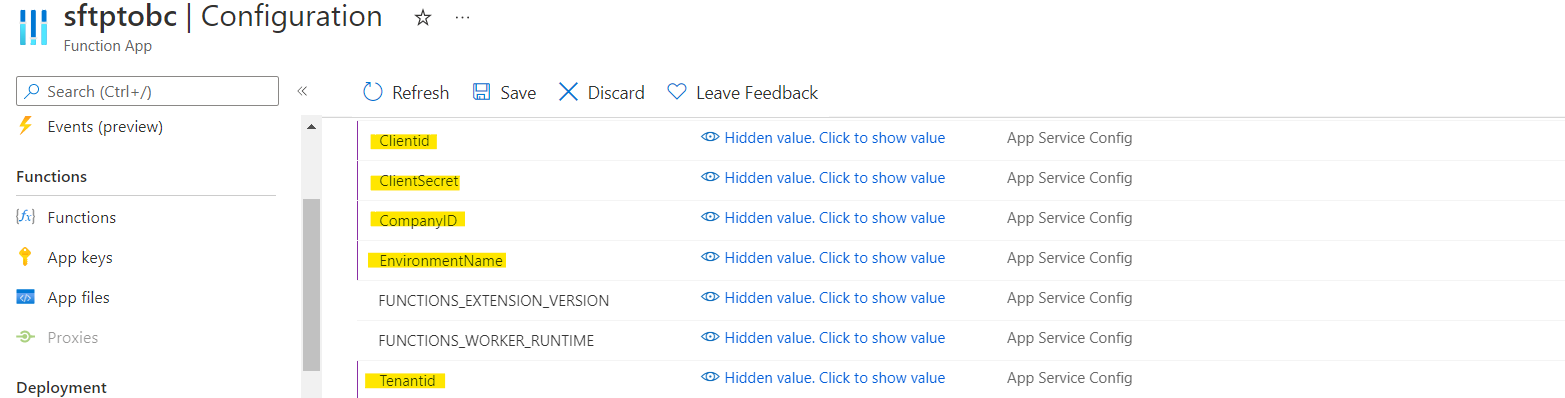
Note:
In the following link, I explain step by step how to make the correct Oauth2 configuration.
To create the Azure function, a transversal project called Share Project has been created, which has all the logic to call the webservices, use Oauth2, etc, and which has also been reused in other projects. I will leave the link to a previous post that may contain relevant information.
Below is the structure of the Azure Function project.
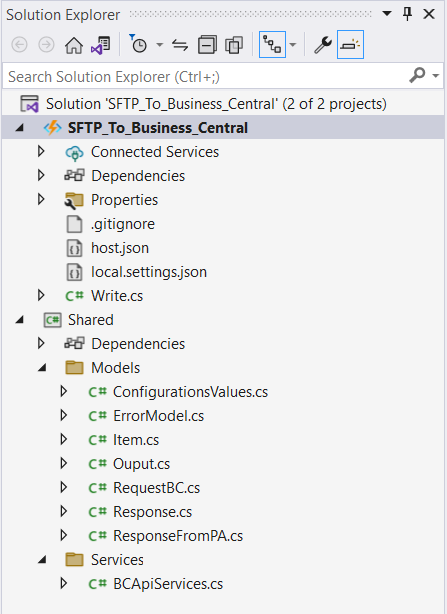
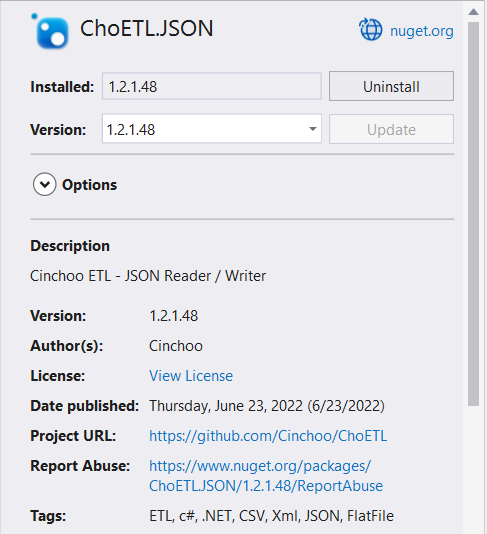
In this project, I have worked with the ChoETL.JSON nutget that helped me to easily convert the CVS file to JSON.
Code:
Azure Function
The following code corresponds to the Azure Write Function, which will be the one we will call from Power Automate.
BCApiServices
This code represents the service belonging to the Shared Project, which will allow us to insert the information in Business Central.
In order not to make the post more difficult to read, I will leave the complete code of the Azure Project and the Shared Project at the end of the Post.
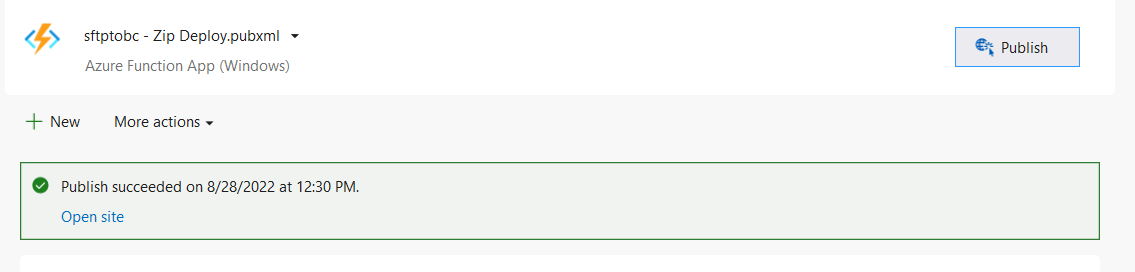
Once the Azure Function is published, we will use the link generated in step 6 of the next Power Automate section.
Power Automate
Power Automate, formerly called Microsoft Flow, is an online tool within Microsoft 365 apps and add-ons used to simplify repetitive tasks through automated workflows between apps and services to sync files, receive notifications, and collect data.
With this tool, we will create an automatic process, which will identify when a file is created in the determined SFTP, to later extract the information and process it, in this case, send it to Business Central through our previous Azure Function that will help us to connect and process the CSV file.
To create and configure our automatic process we will do the following steps:
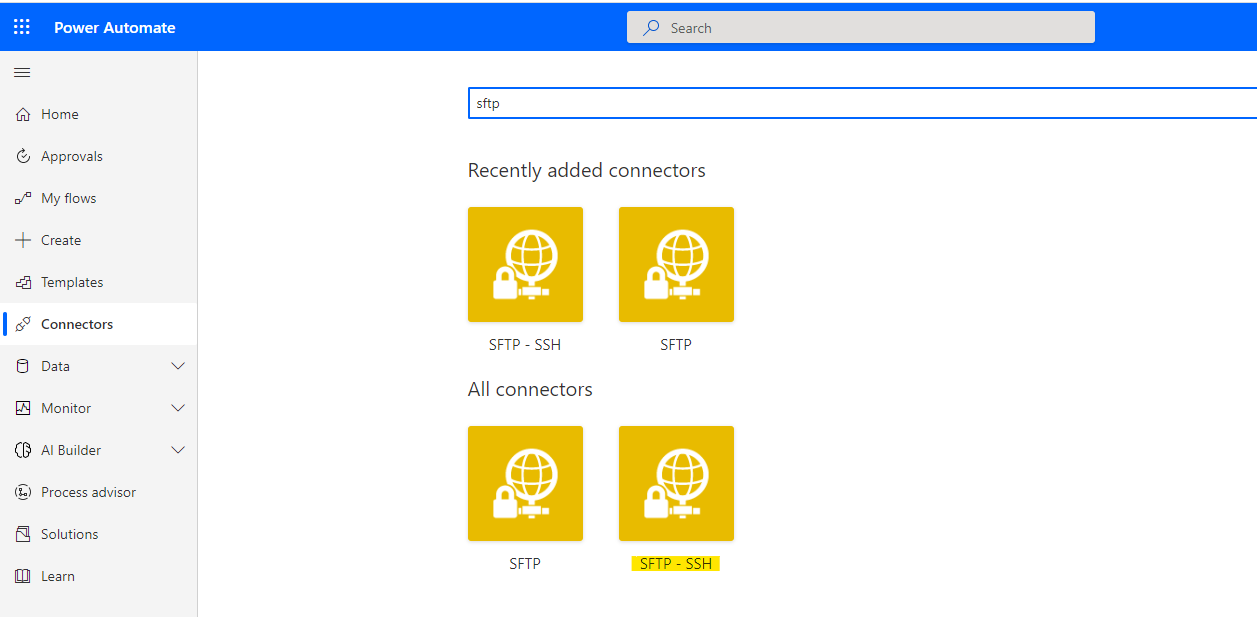
- We click on connector and look for SFTP
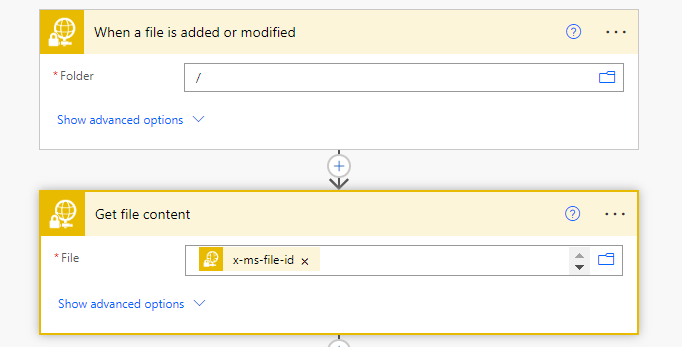
- Then, we choose the trigger “When a File is added or modified”

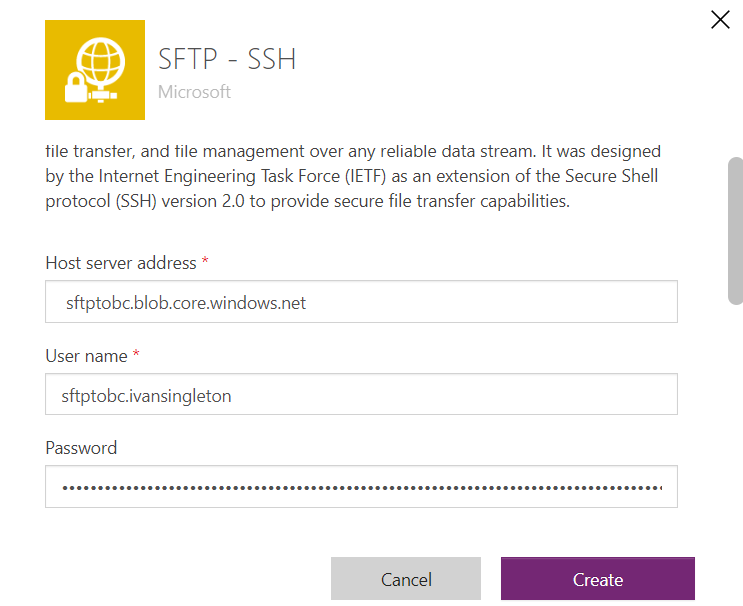
- We configure the connector, similar to how we did to connect from FileZilla’s client.
We introduce the Host, the User, and the Password.
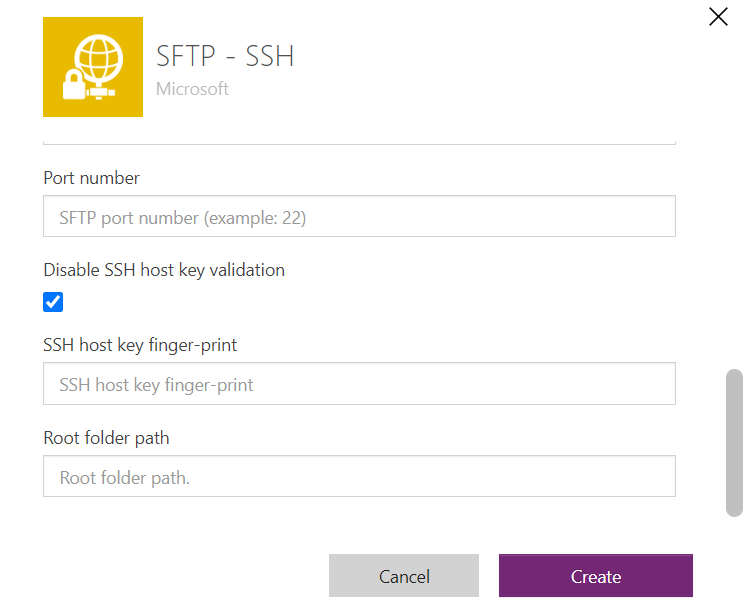
- And before saving the settings we disable SSH Host Key validation
- Once the connector is configured, we add the Get File Content trigger, with the purpose of extracting the information from the CSV file that has just been added or modified.
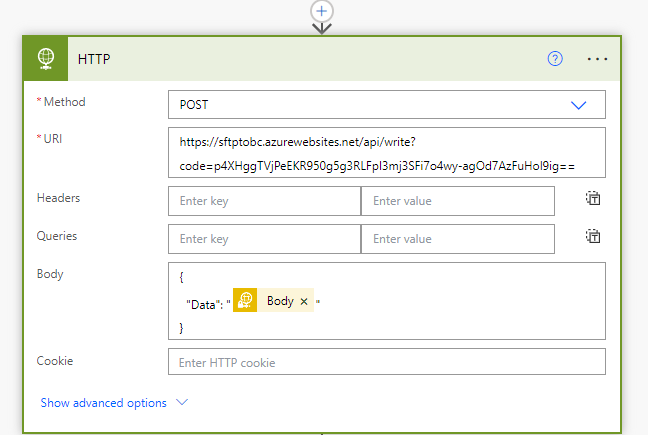
- We add the HTTP Trigger, with the purpose of calling the azure function, which will be in charge of processing the file and connecting to Business Central with Oauth2.
You can see that the URL has the following parameter at the end
?code=p4XHggTVjPeEKR950g5g3RLFpI3mj3SFi7o4wy-agOd7AzFuHol9ig==This is because the authorization level that we configure in the function is AuthorizationLevel.Function, If we had chosen Anonymous, it would not have been necessary.
Additionally, we have placed a JSON as a Body with the Data key and the Body (Which contains the File Content) value obtained in the previous step.
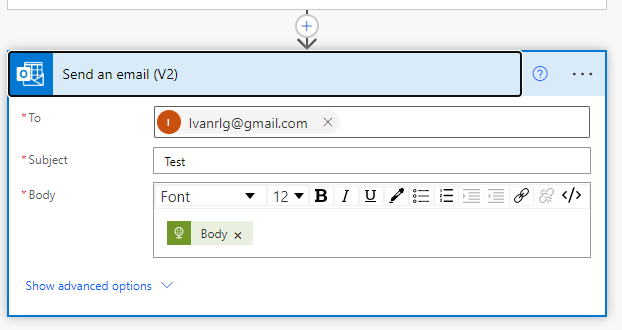
- Finally, as an optional step, I have used the Send Email Trigger when the file has been processed or not.
Conclusion
With this post, we show a way to register a record in Business Central automatically when creating or updating a CSV file on an SFTP server.
For more information on the prices of Power Automate click on this link and Azure Functions prices click on this link.
Code on Github
All the code used in this post can be found in the following links:
Azure Functions.
Business Central Webservices.
I hope this has been helpful.