In the next post, I will show how to use the OpenAPI Specification (OAS) standard to document and Try Out the Standard APIs exposed by Microsoft in Business Central and also how to achieve it for Custom APIs.
First, I want to give a very brief summary of what the OpenAPI standard is.
OpenAPI is a standard for the description of programming interfaces (APIs), which allows both humans and computers to discover and understand the capabilities of the service without access to source code, documentation, or through inspection of network traffic. In particular, OpenAPI can be used to describe, develop, test, and document REST-compliant APIs.
The files, which we are going to use to publish as OAS, will be in the YAML format, which is defined as a human-readable data serialization format inspired by languages like XML, Python and C, as well ,as email formatting.
Below is the link to the project created on Github.
This post will have the following sections:
- Publishing the standard Business Central APIs to SwaggerUI locally.
- Configuring App Registration to run Oauth2 locally.
- Try Out Standard APIs through Swagger UI and Oauth2.
- Creation of Custom API, documentation and try out in Swagger UI and Oauth2.
Publishing BC Apis in SwaggerUI
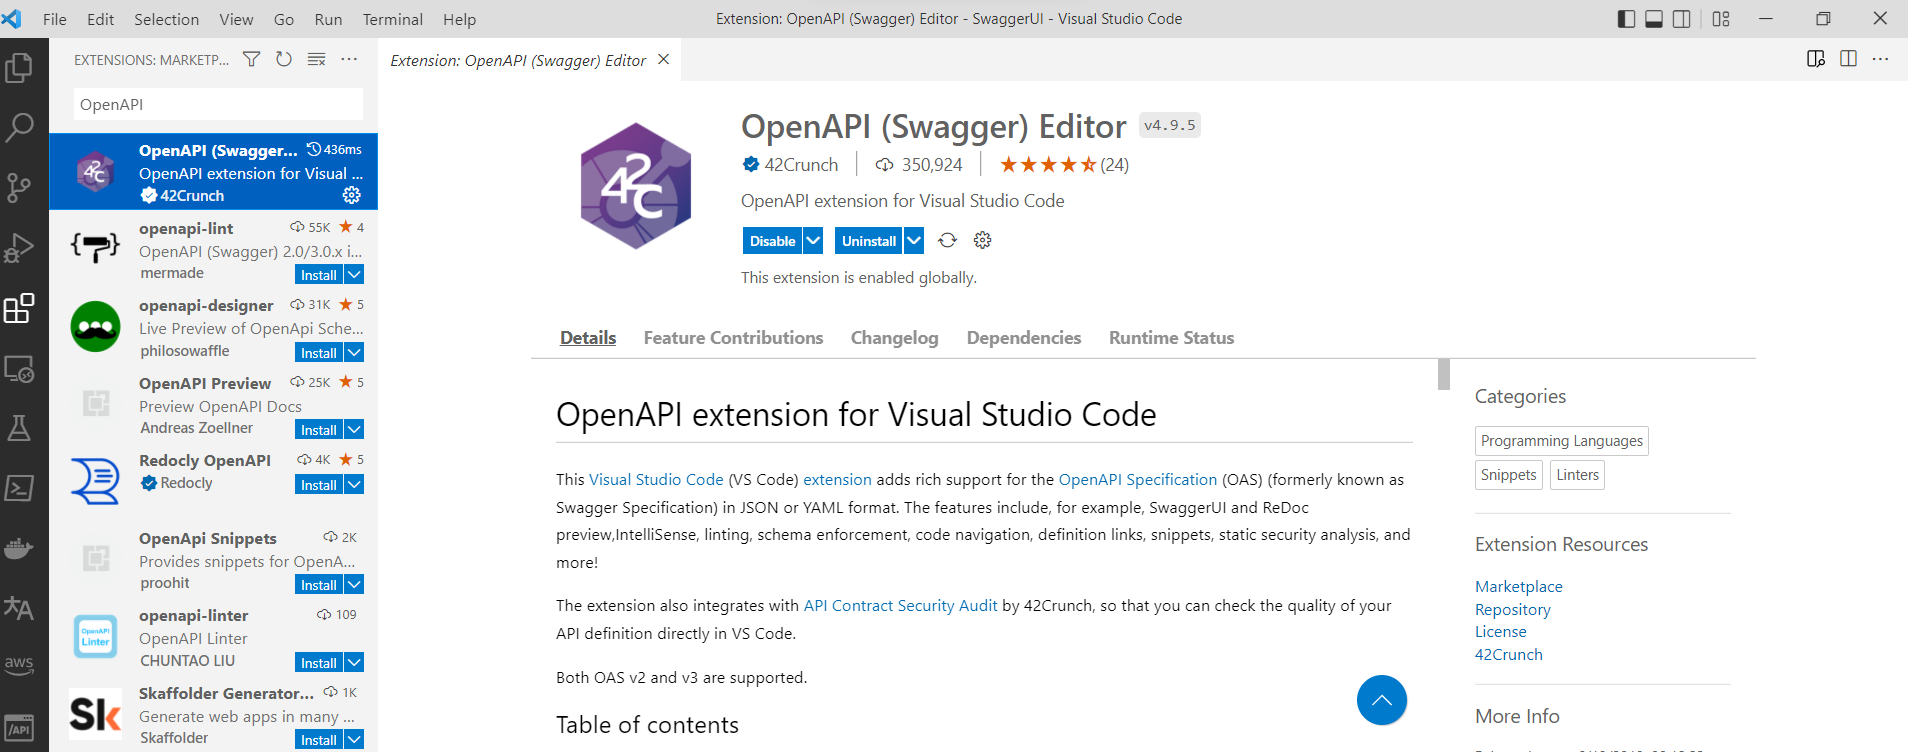
- The first step is to install the OpenAPI extension in the Visual Studio Code (VSC).
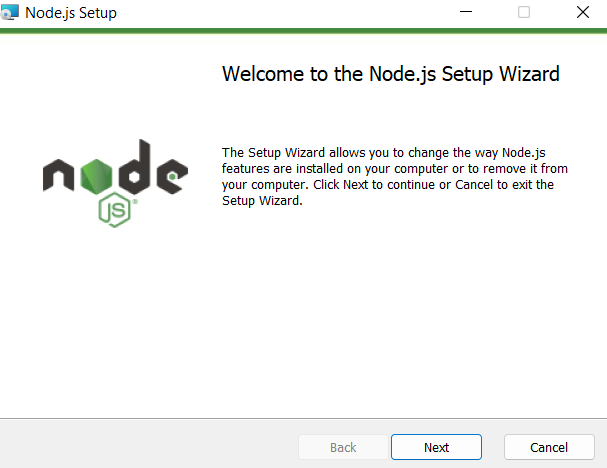
- Then, we must install Node.js from the following link.
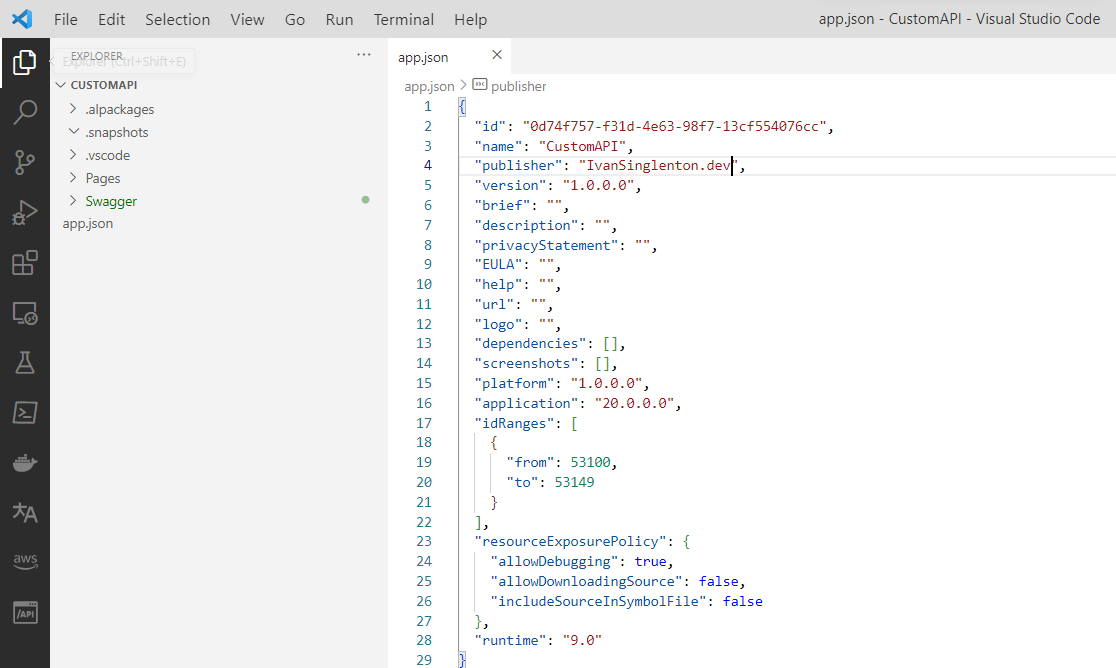
- Now, we will create a new Business Central AL project in VSC, this is because we will then create a Custom API. In this step, we will create 2 folders, Pages and Swagger.
- From the VSC Terminal, we enter the Swagger folder and execute the following command.
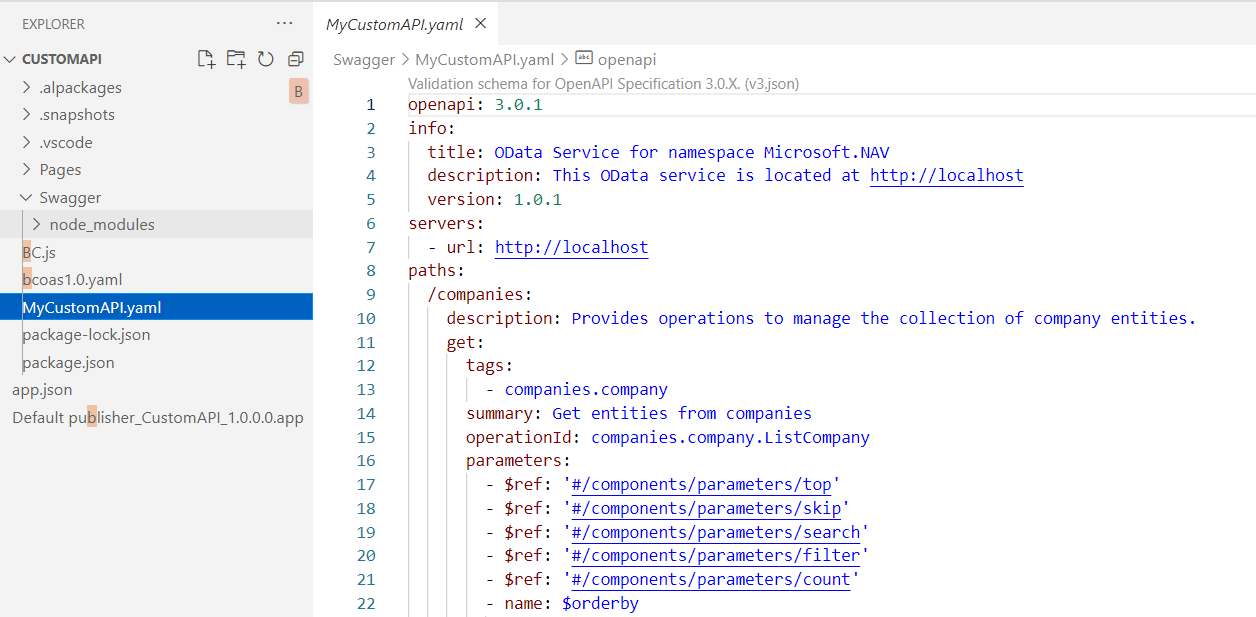
npm install express swagger-ui-express yamljsA folder called node_modules and a couple of files will be created as seen in the following image:
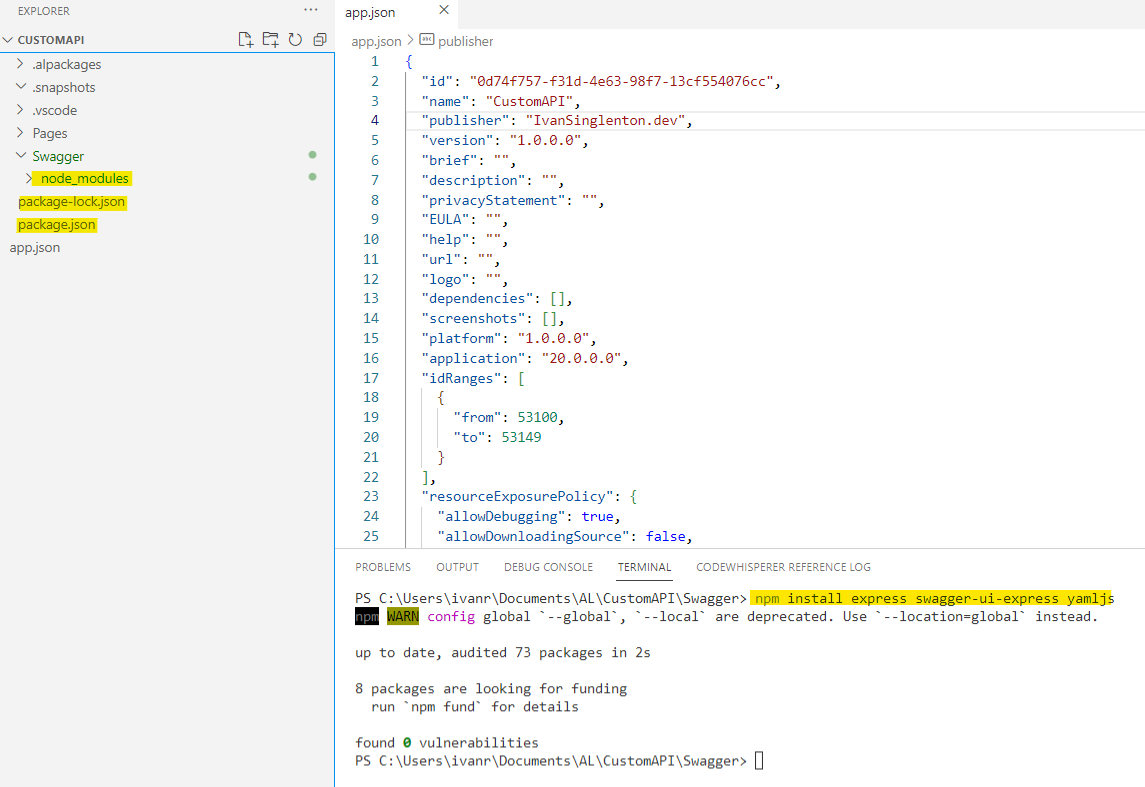
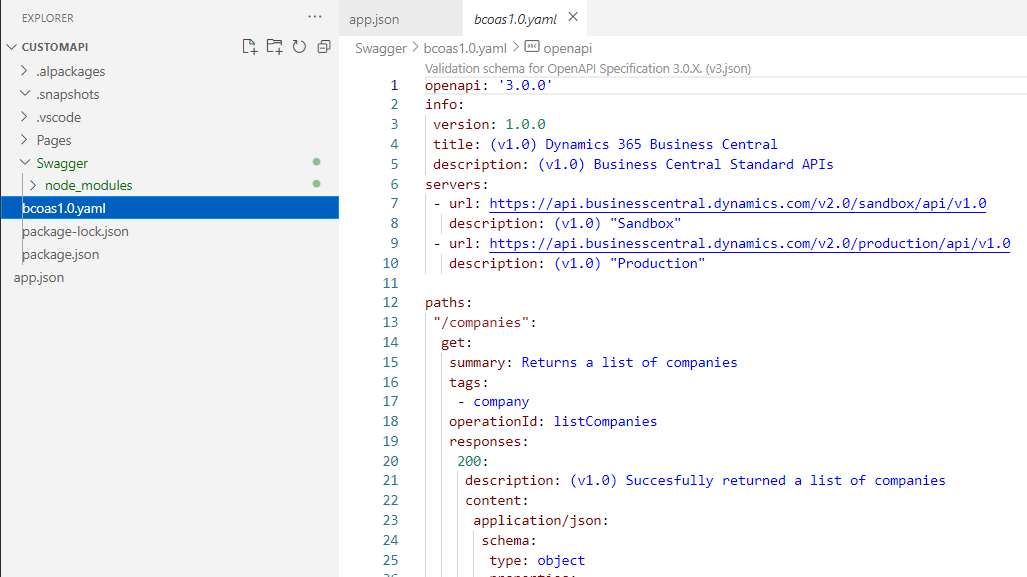
- In the following link we will download the Business Central Standard API in yaml format, then we will put it inside the Swagger folder.
- We will create a js file, I call it BC.js and we will add the following code:
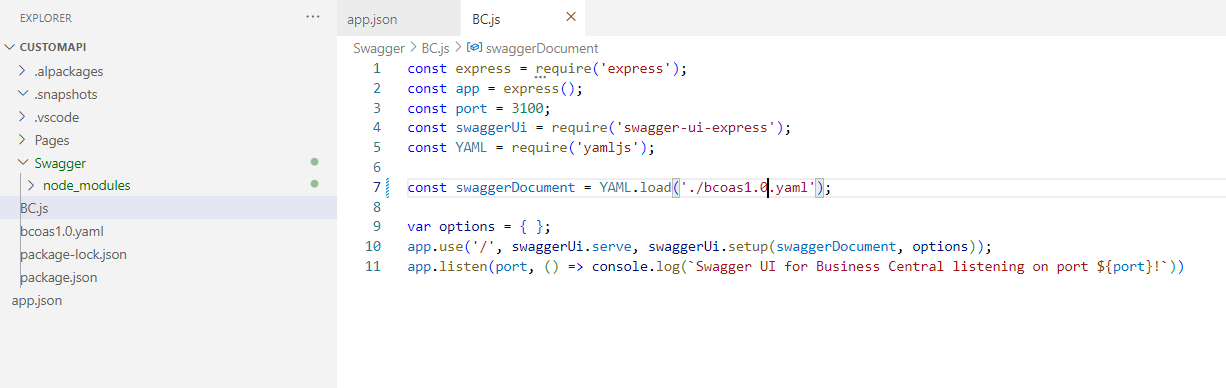
- Run the node app created through the following command:
node BC.jsThe following message will appear on the terminal: Swagger UI for Business Central listening on port 3100.
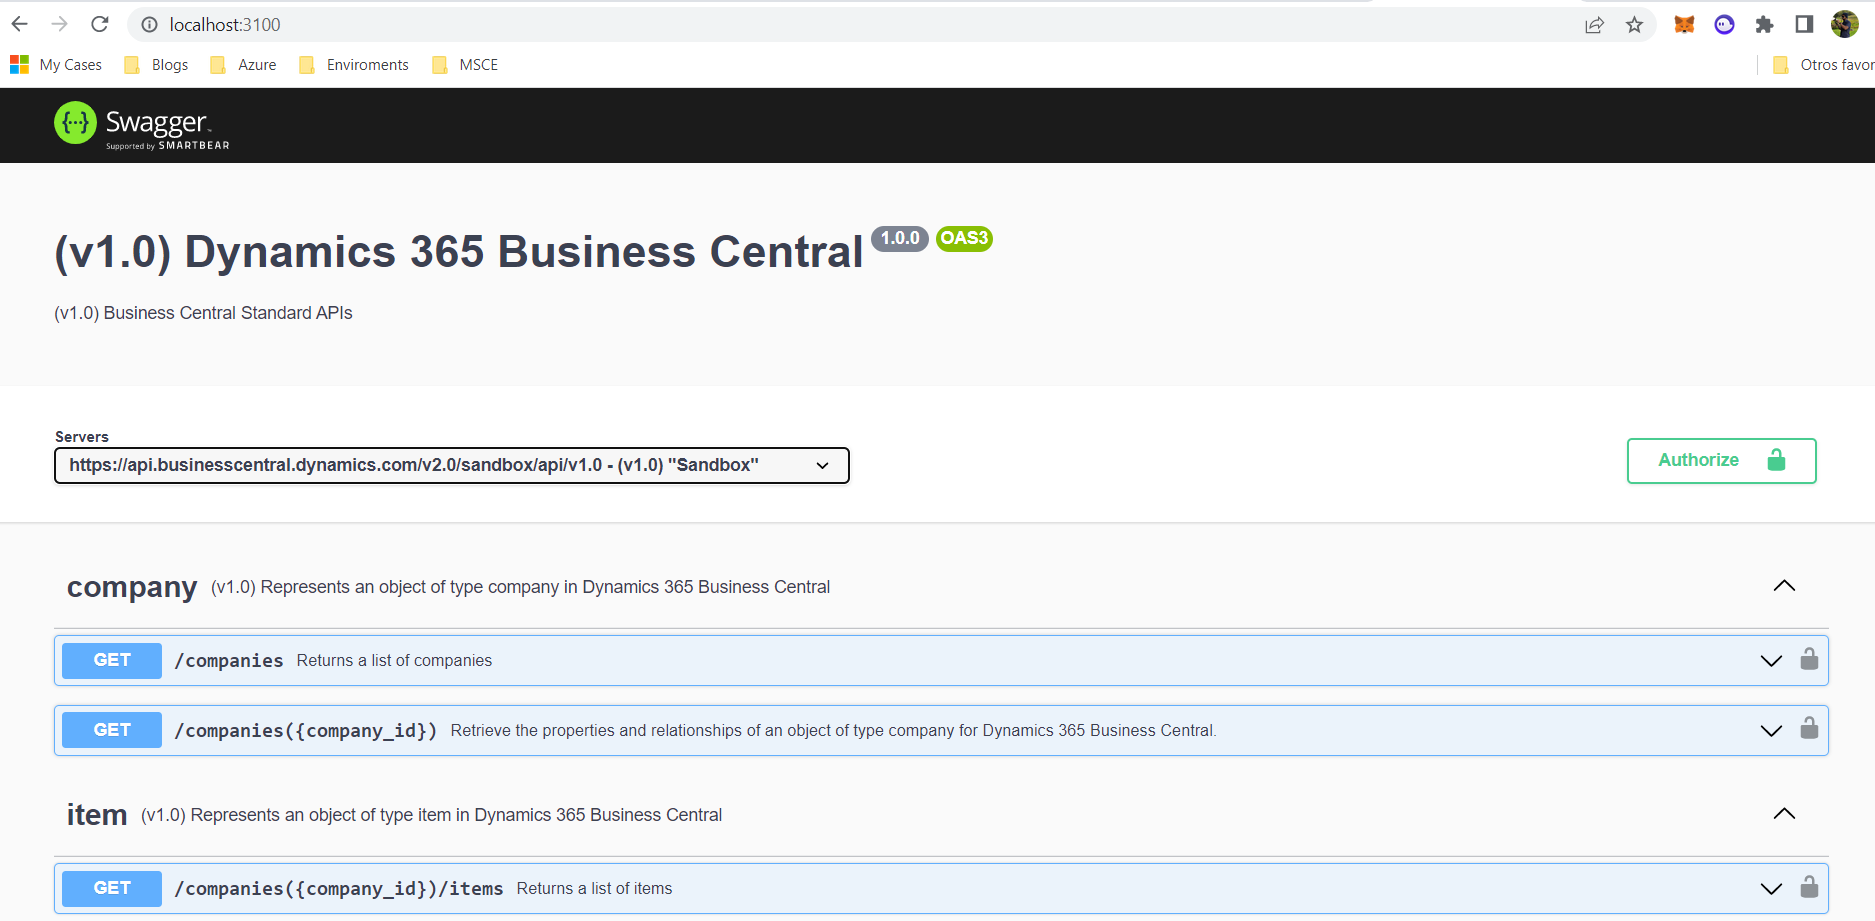
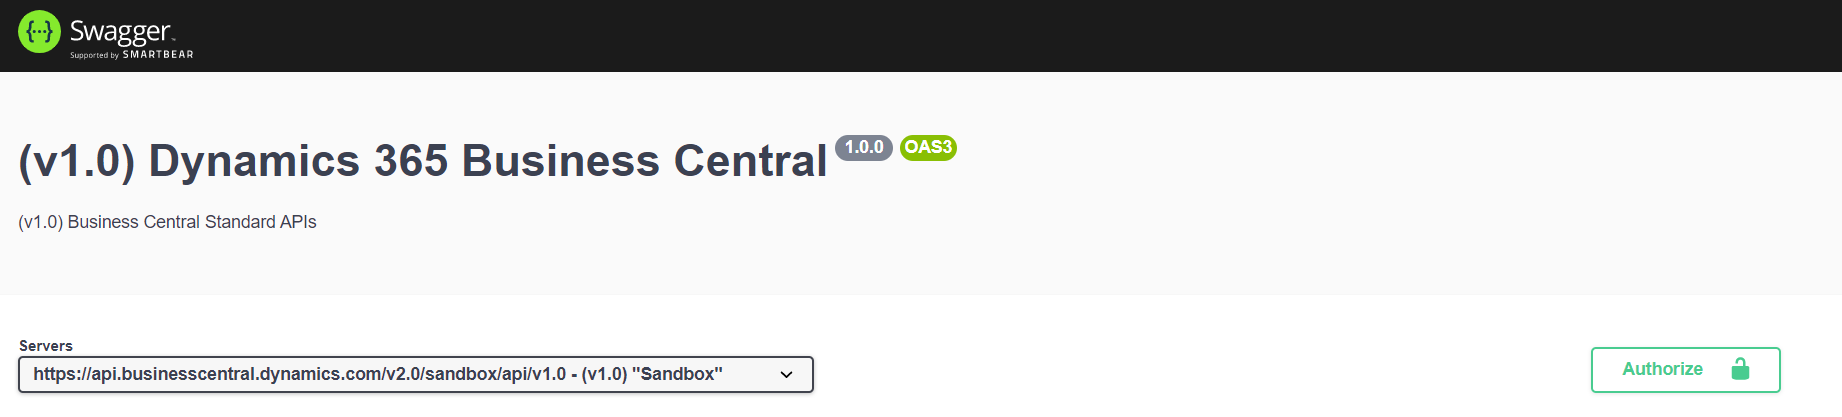
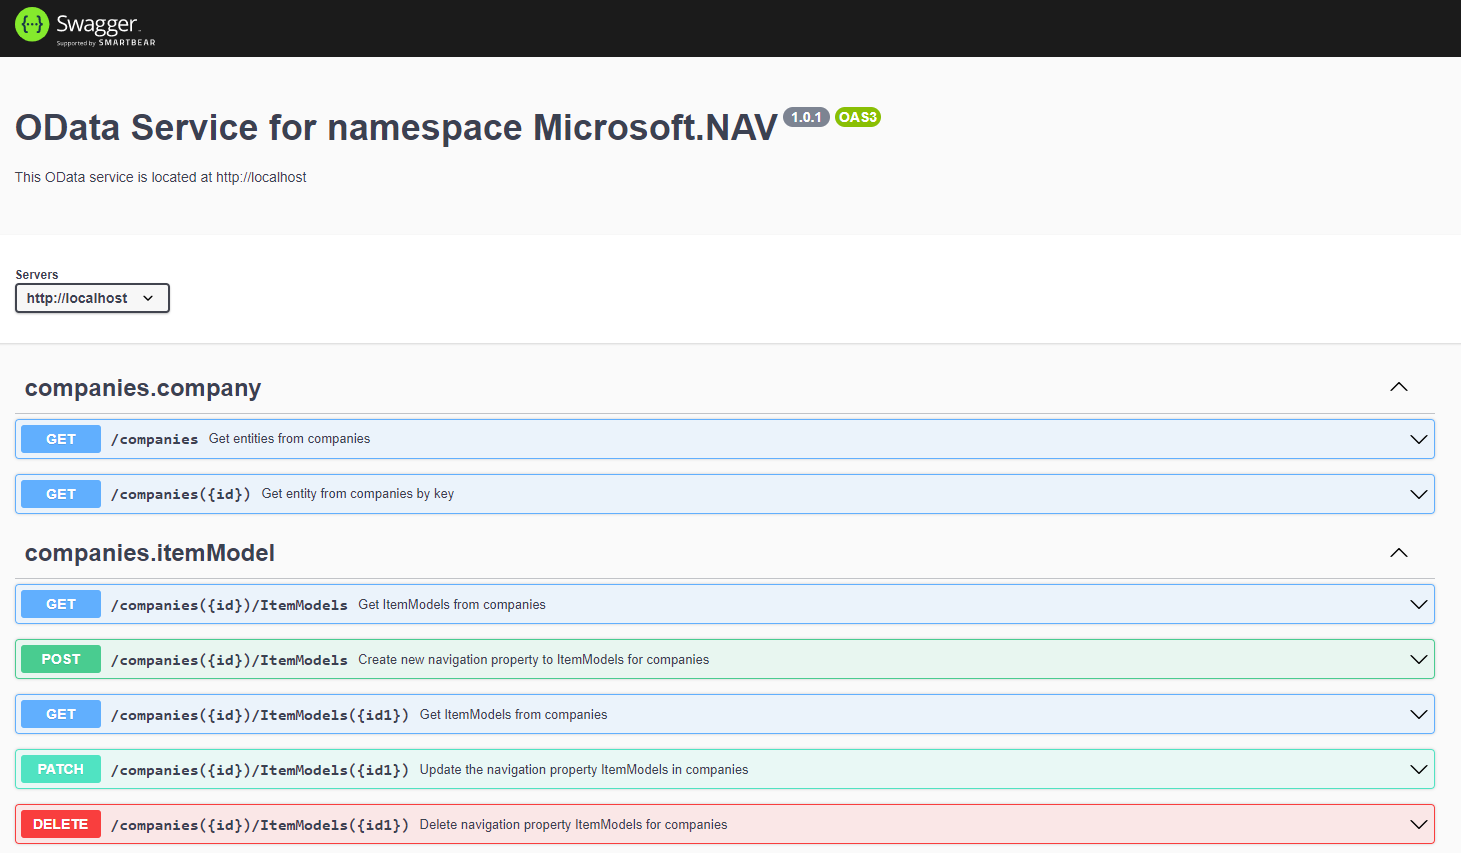
And if we go to the browser and write http://localhost:3100/ the following page will be displayed:
So far we have documented the Business Central Standards APIs with Swagger.
Configuring Outh2
Before Try Out the Standard APIs, we have to have an App Registration configured in the Azure Active Directory to authenticate us, in this post I explain how to achieve it.
Once we have configured our APP Registration, we have to configure a couple of things:
1 Redirect URLs:
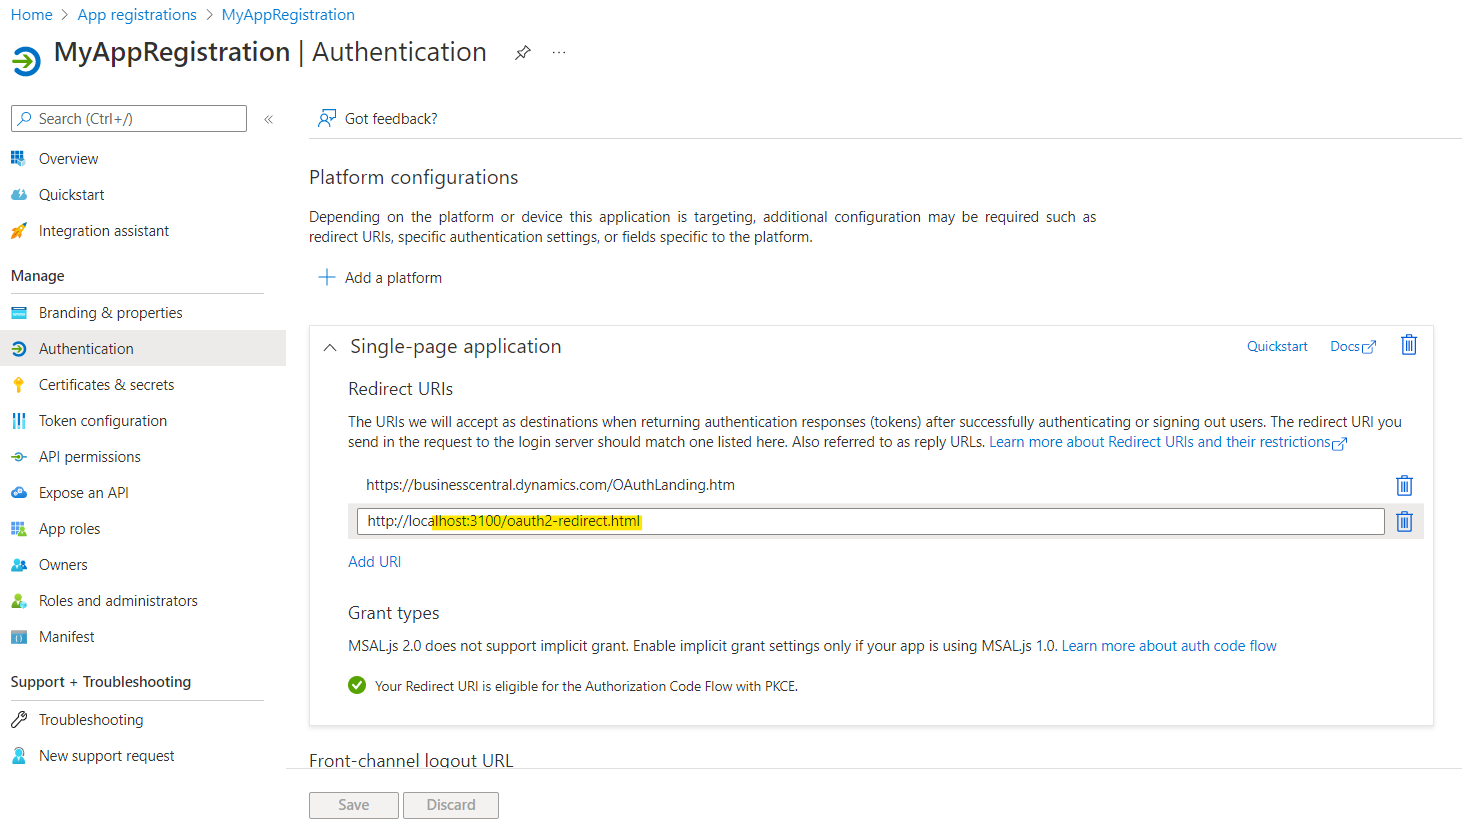
We go to our App Registration, we click on Authentication and in the Redirect URLs section, we copy the one that we have published in the node app.Url = URL de App Node + oauth2-redirect.html
In my case it would be this:App node local URL: http://localhost:3100/
URL= http://localhost:3100/oauth2-redirect.html
This would be the URL that we are going to add in Redirect URLs as seen in the following image:
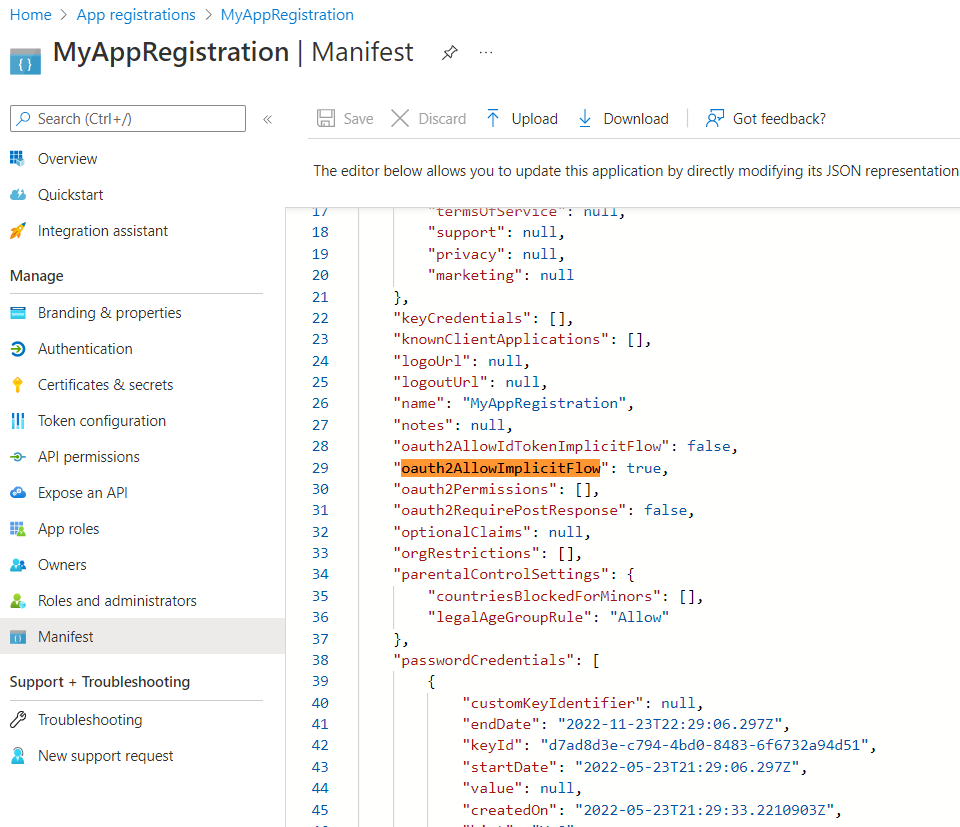
2 Update the Manifest:
Inside the App Registration, we click on Manifest, then look for “oauth2AllowImplicitFlow” and change the value from false to true.
3 We copy the Client ID.
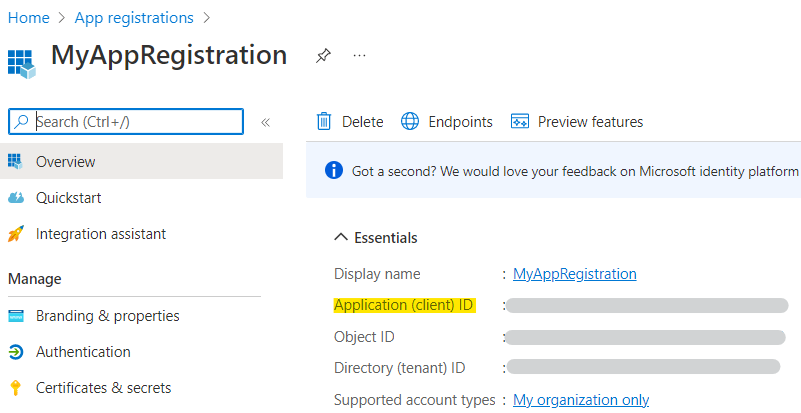
And we are ready to execute queries to the BC APIs from SwaggerUI
Try Out Standard APIs
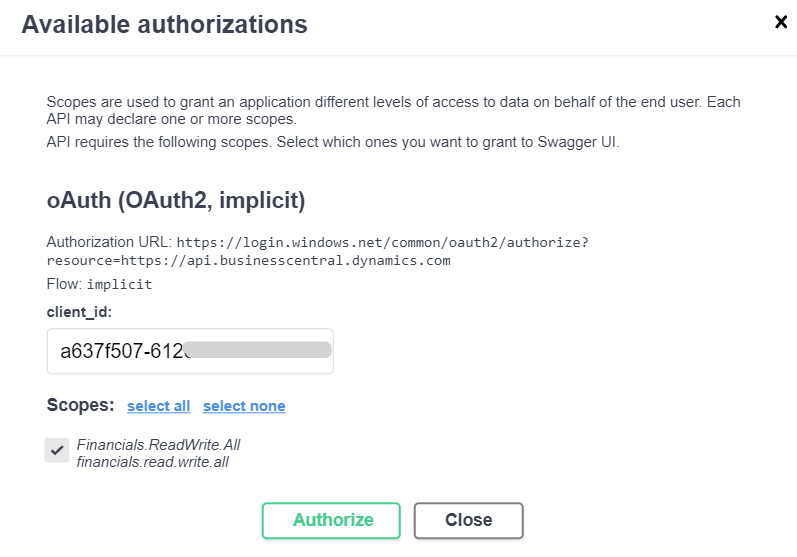
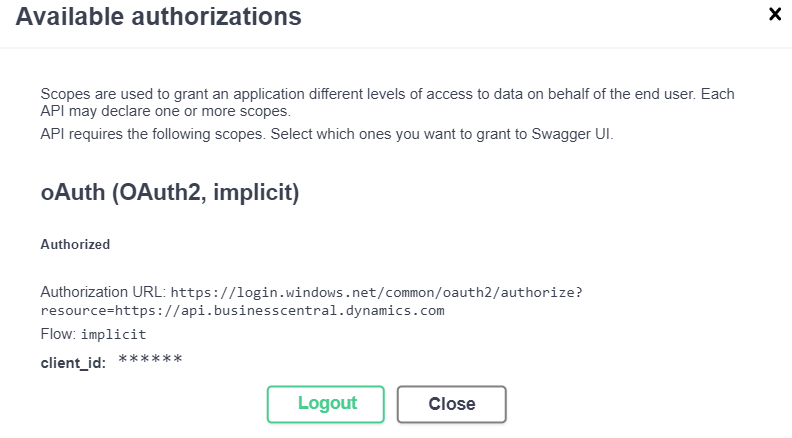
1) We click on Authorize.
2) And the following window will open, where we must copy the Client Id of our App Registration and select the available Scope.
3) Then we will use our Business Central credentials and upon accepting the following window will open:
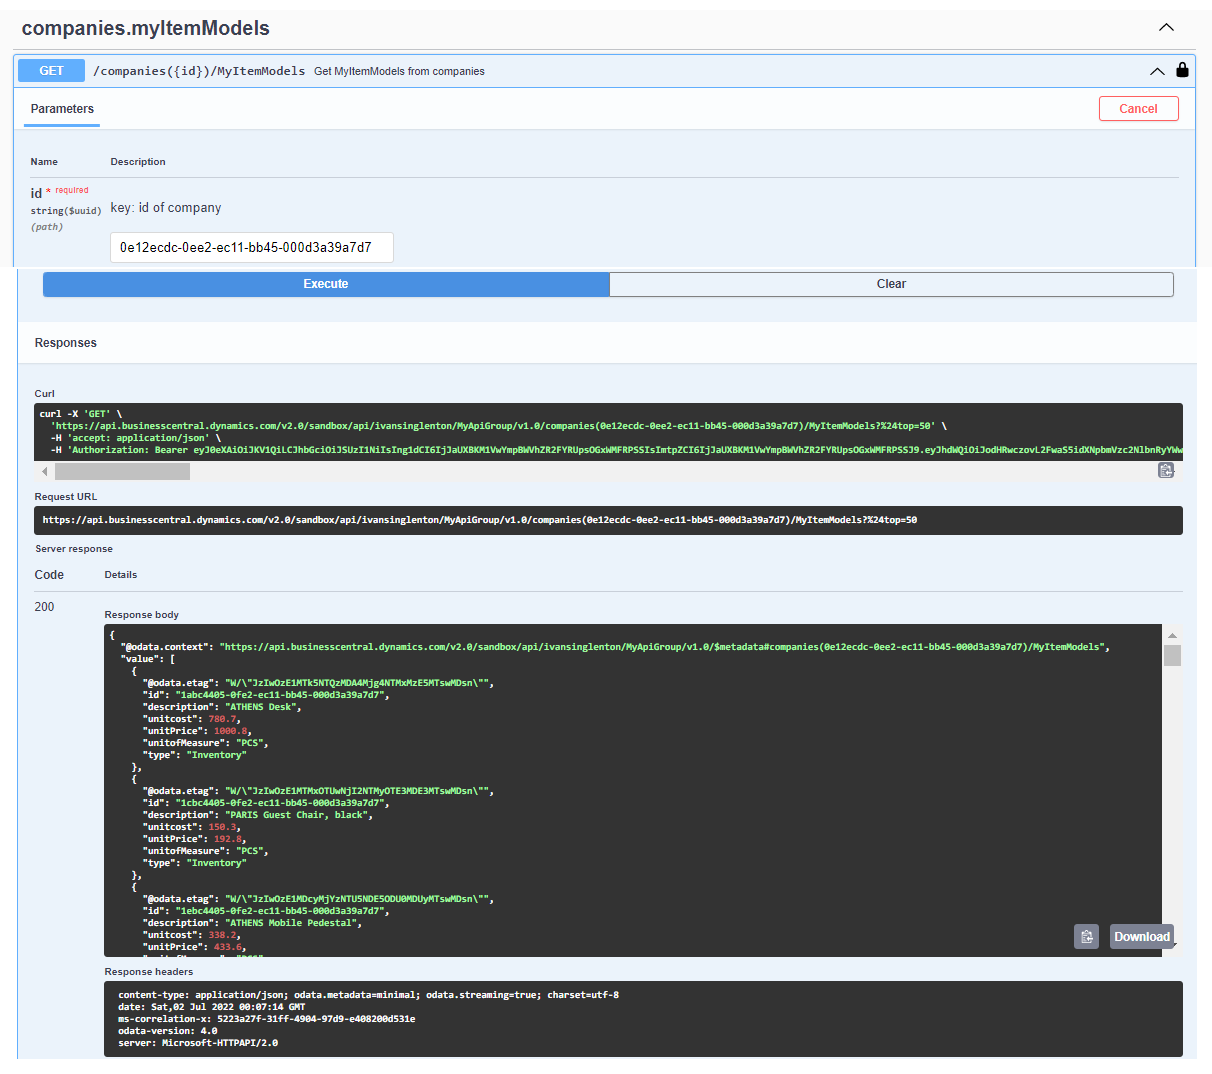
4) And now we can query Business Central from SwaggerUI.
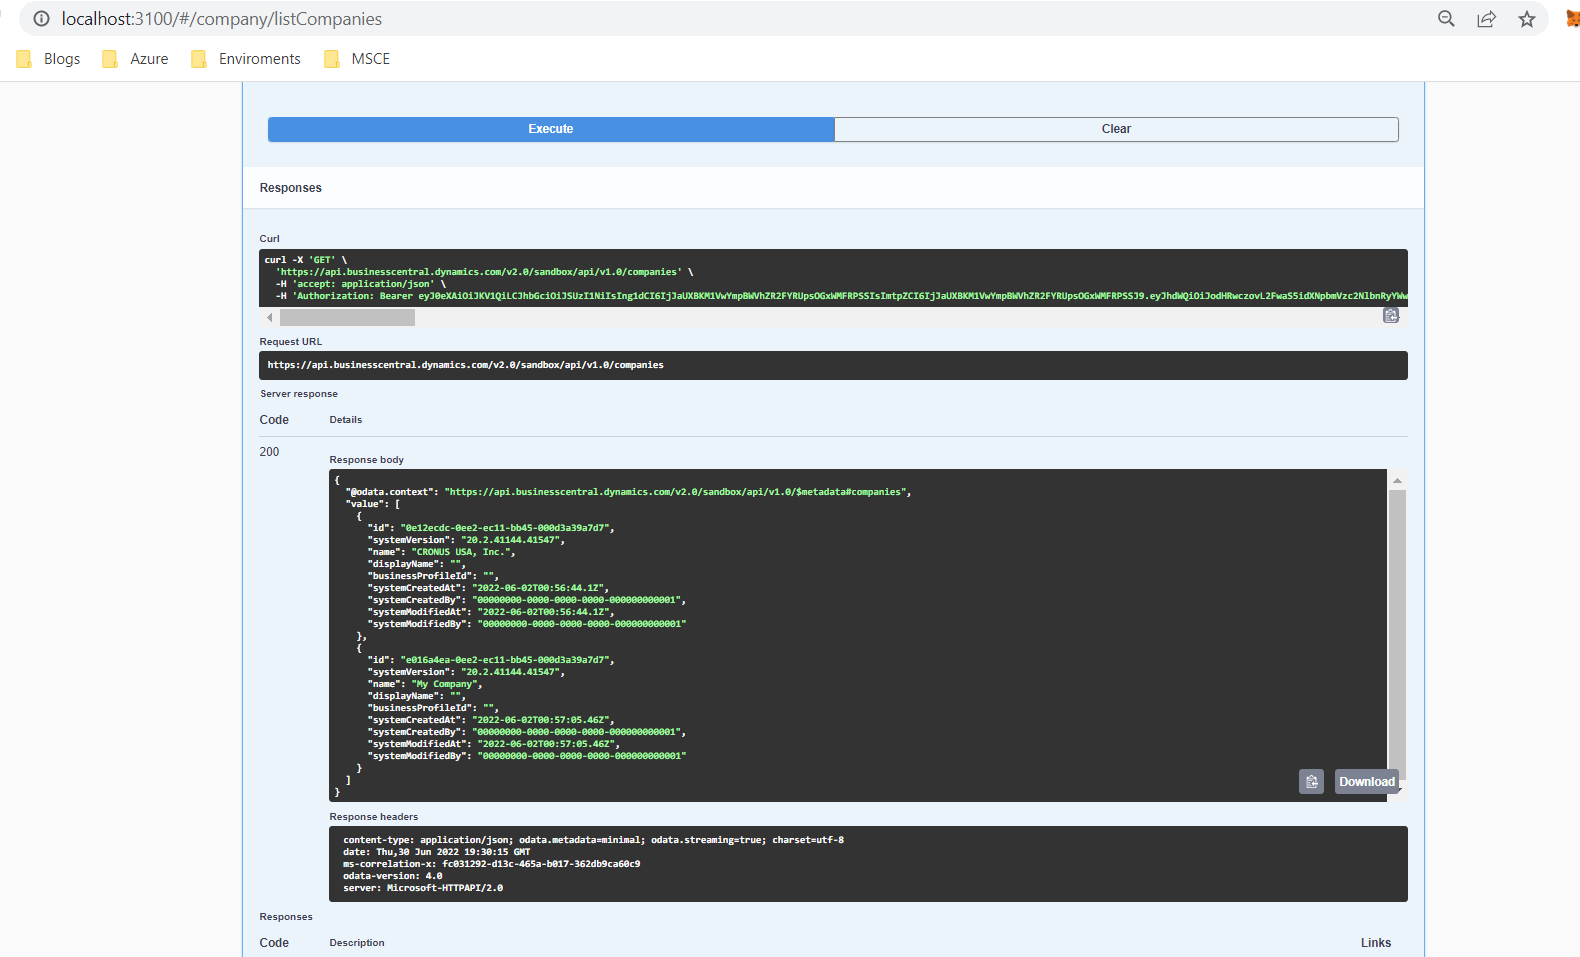
For example, suppose we want to list companies. We just have to click on Try it Out

And then in Execute and it will return the query as shown below:
Creation of Custom API, documentation and try out in Swagger UI and Oauth2.
We will start with a small example of creating a Custom API through a Page type API in Business Central.
API page type
Next, I share the code of the Page type API, which will be the one that we will document and test in Swagger.
In the following Microsoft Link, there is more detailed documentation on how to create Customs APIs.
Generating the API page type .edmx file
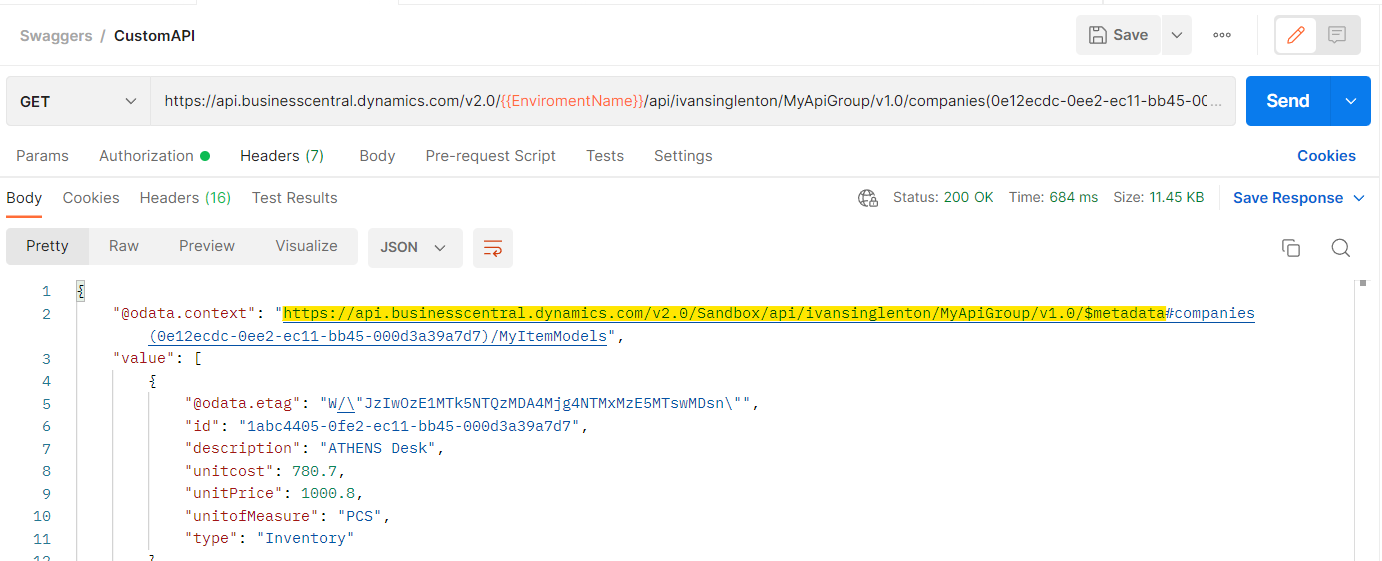
Once our Page is published, we can consume it from Postman, for example:
URL = https://api.businesscentral.dynamics.com/v2.0/ + /Environment Name + /api + /APIPublisher + /APIGroup + /APIVersion + /companies(aaaaaaaca-bbbb-ccc-dddd-000eeeeeee7) + /EntityName

https://api.businesscentral.dynamics.com/v2.0/{{EnviromentName}}/api/ivansinglenton/MyApiGroup/v1.0/companies(0e12ecdc-0ee2-ec11-bb45-000d3a39a7d7)/MyItemModels
And in the result of @odata.context we copy the first part to where $metadata arrives
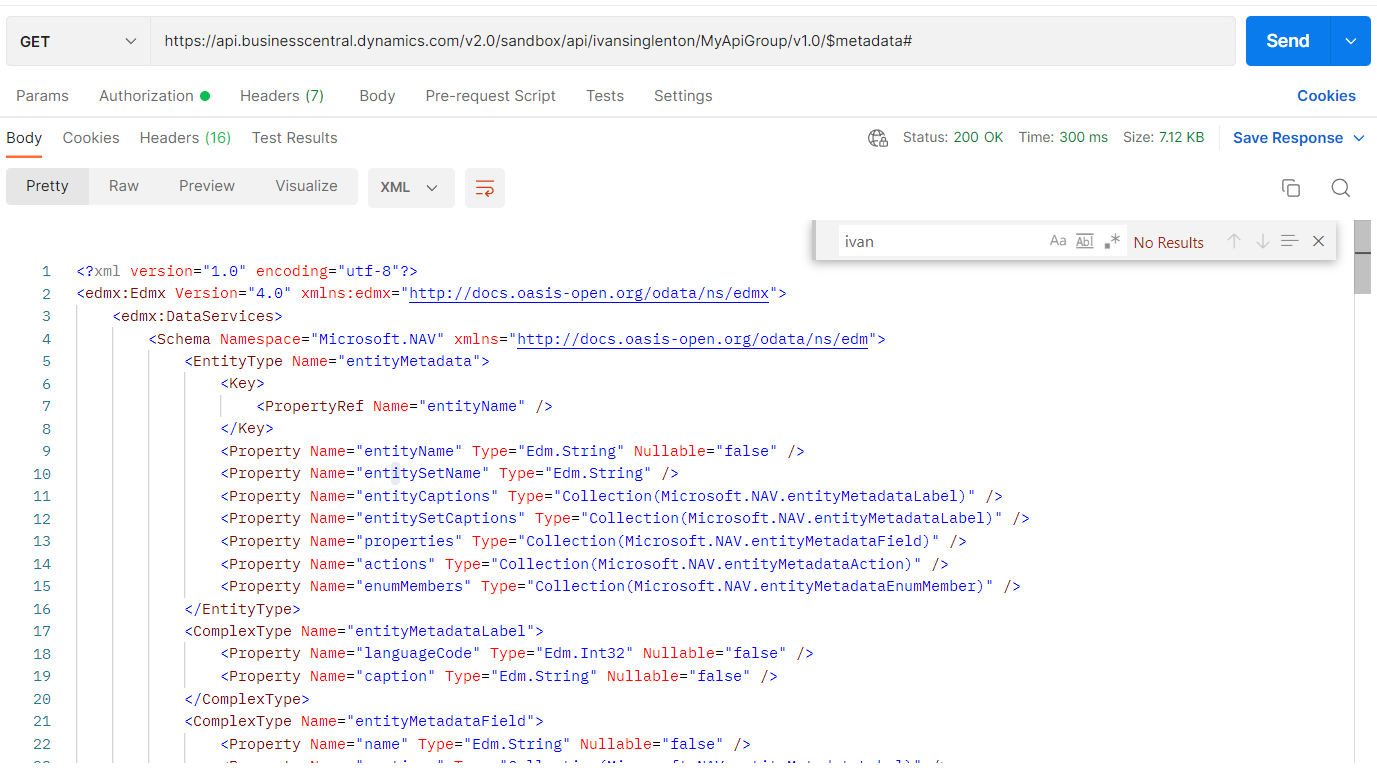
This is the resulting URL:
https://api.businesscentral.dynamics.com/v2.0/Sandbox/api/ivansinglenton/MyApiGroup/v1.0/$metadata#The next step will be to consume it in Postman, and the result will be saved with the extension .edmx
Converting the .edmx file to YAML
To achieve this, we are going to use this project that has a library that allows converting the OData to the OAS format.
Step 1: Clone the repository in Visual Studio and build the project.
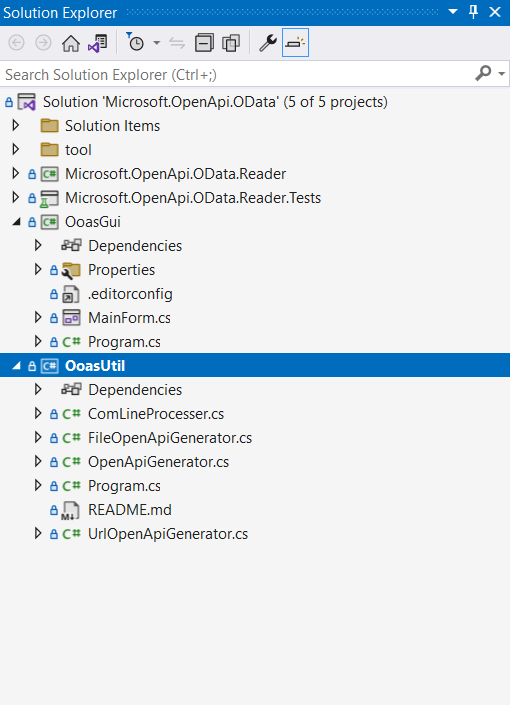
Step 2: We copy the .edmx file generated in Postman into the Bin folder of OoasUtil
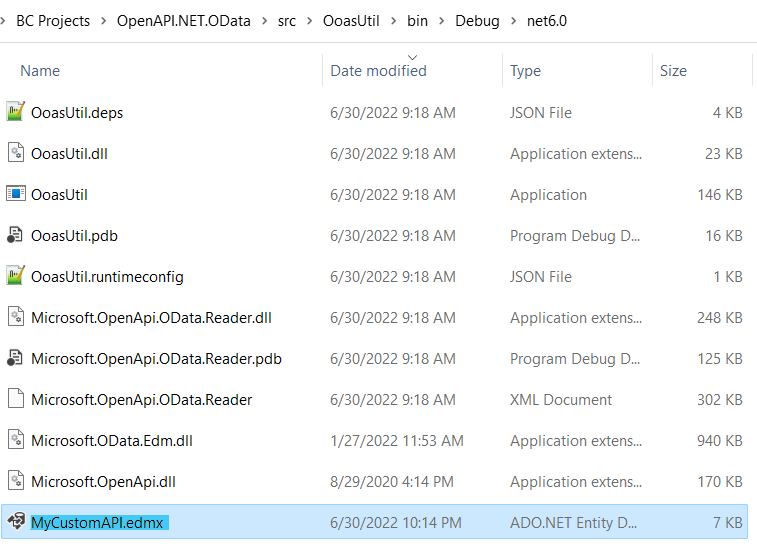
Step 3: Let’s open the console. (In this case, I will use the same one from Visual Studio) and I will go to the bin folder where I copied the file in the previous step.
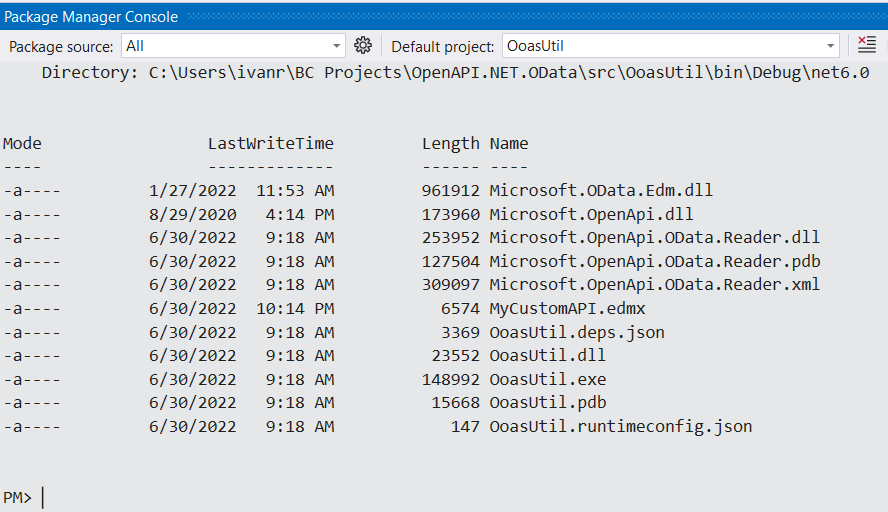
Step 3: We will use the following command to create the conversion:
.\OoasUtil.exe -y -i MyCustomAPI.edmx -o MyCustomAPI.yaml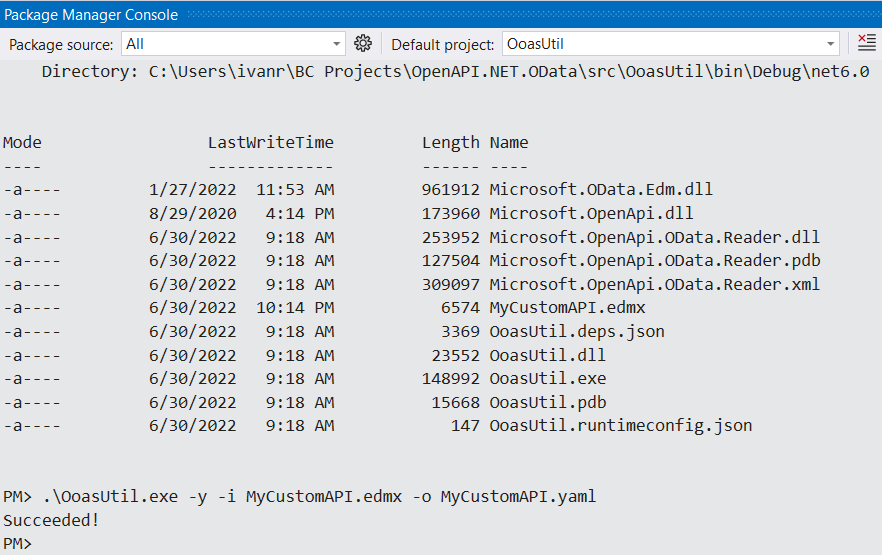
And that’s it, already in this step, we have the file in the same format that we had downloaded from Microsoft at the beginning of the Post.
Now, in the same way, that we did with the first file, we’ll take this one and bring it into the Visual Studio Code project.
We update the file name:
const swaggerDocument = YAML.load('./MyCustomAPI.yaml');
And we run the node app again with the command: node BC.js
A window similar to the following image will be executed, but as you will notice, there is all the documentation related to the Custom API published, but it does not have how to perform Oauth2.
Trying out in Swagger UI and Oauth2
To configure that the Custom API can be executed with Outh2 we will configure 2 more things.
Let’s go to the generated MyCustomAPI.yaml file and make the following changes
1. We adjust Information and Servers with the following information
Custom API: Below is the formula we will use to call our API.
URL = https://api.businesscentral.dynamics.com/v2.0 + /Environment Name + /api + /APIPublisher + /APIGroup + /APIVersion
URL = https://api.businesscentral.dynamics.com/v2.0/sandbox/api/ivansinglenton/MyApiGroup/v1.0/
Standard API: For the Standard APIs we will use the same ones from the bcoas1.0.yaml file that we had previously downloaded.
URL =  https://api.businesscentral.dynamics.com/v2.0 + /Enviroment Name + api/v1.0
URLSandbox = https://api.businesscentral.dynamics.com/v2.0/sandbox/api/v1.0
URLProduction = https://api.businesscentral.dynamics.com/v2.0/production/api/v1.0
Putting it all together would look like this:
info:
version: 1.0.0
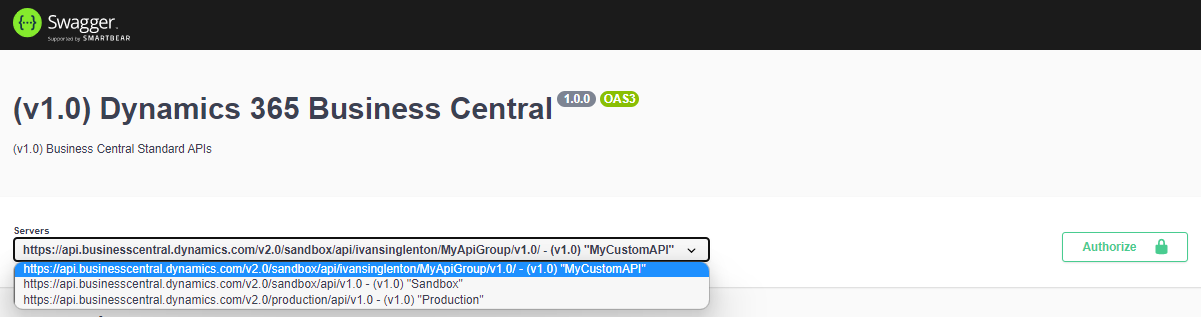
title: (v1.0) Dynamics 365 Business Central
description: (v1.0) Business Central Standard APIs
servers:
- url: https://api.businesscentral.dynamics.com/v2.0/sandbox/api/ivansinglenton/MyApiGroup/v1.0/
description: (v1.0) "MyCustomAPI"
- url: https://api.businesscentral.dynamics.com/v2.0/sandbox/api/v1.0
description: (v1.0) "Sandbox"
- url: https://api.businesscentral.dynamics.com/v2.0/production/api/v1.0
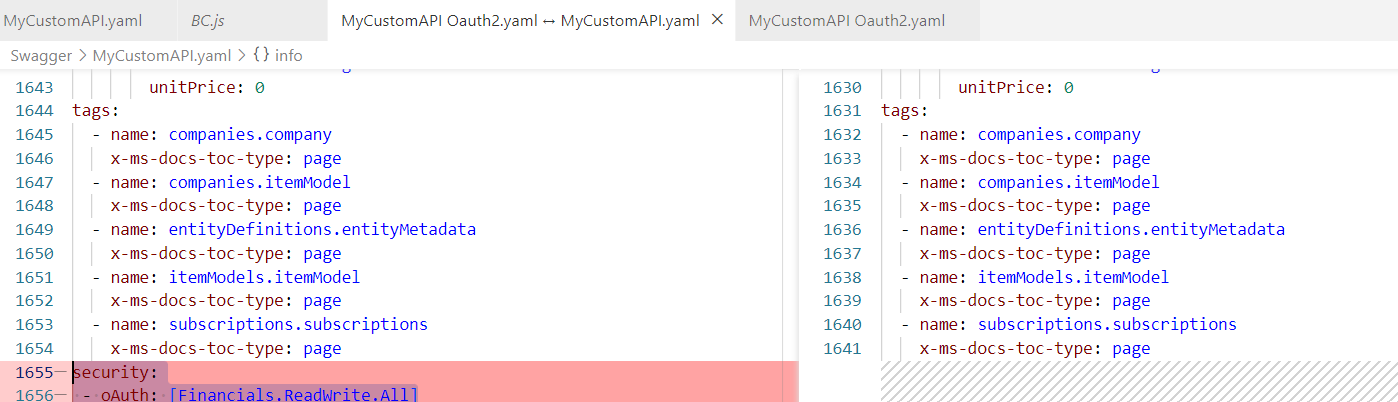
description: (v1.0) "Production"Comparing the files it will look like this:
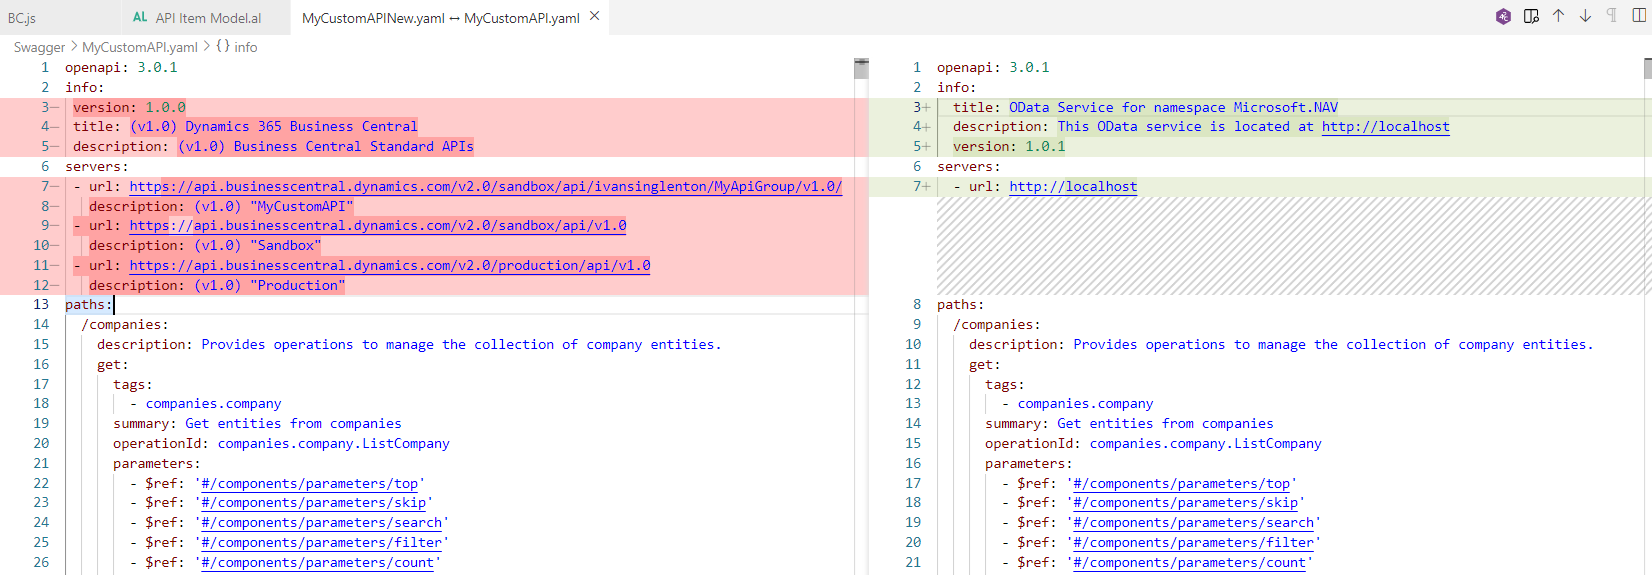
On the left side, how do we want to modify the file, and on the right side how it is originally generated.
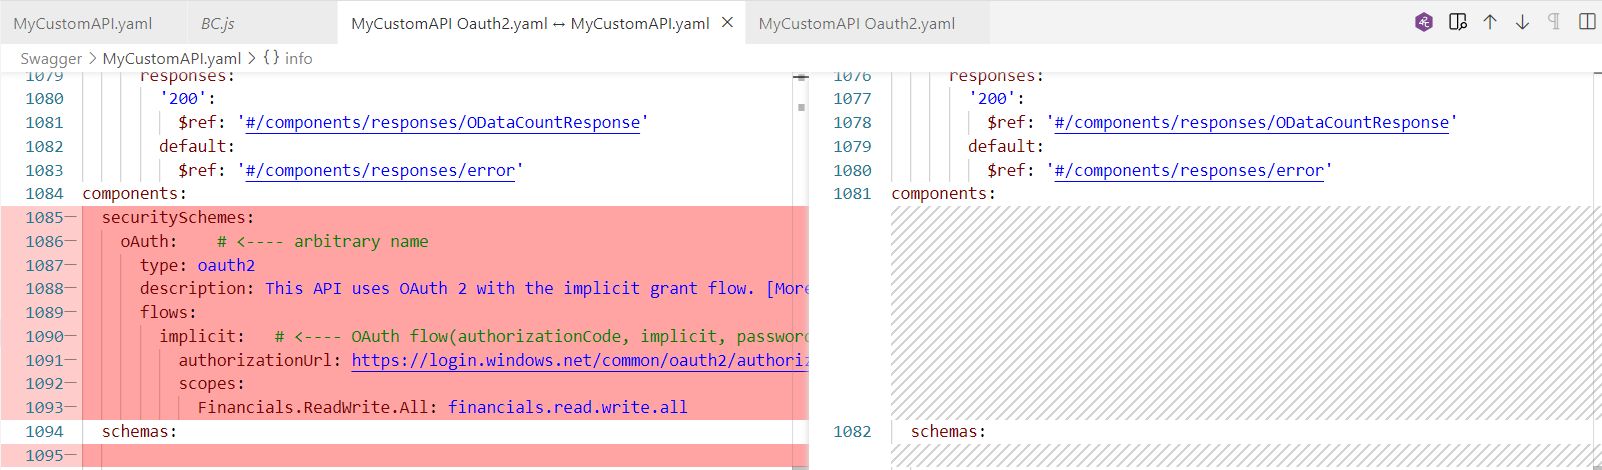
2. We look for the Components tag and copy the following code:
  securitySchemes:
    oAuth:    # <---- arbitrary name
      type: oauth2
      description: This API uses OAuth 2 with the implicit grant flow. [More info](https://api.example.com/docs/auth)
      flows:
        implicit:   # <---- OAuth flow(authorizationCode, implicit, password or clientCredentials)
          authorizationUrl: https://login.windows.net/common/oauth2/authorize?resource=https://api.businesscentral.dynamics.com
          scopes:
            Financials.ReadWrite.All: financials.read.write.all
If we compare the 2 files it would look something like this:
3. And finally, in the last part of the file we add the following code:
security:
 - oAuth: [Financials.ReadWrite.All]
If we compare the 2 files it would look something like this:
The result will be the following file: MyCustomAPINew.yaml
4. TEST
After executing, we will have Outh2 enabled in our Custom API, as we can see, we will have 3 URLs.
To obtain the Company Id we will use those related to the Standard APIs.
To try out the CustomAPI we will use the URL that MyCustomAPI places in my case.
If you want more information about OpenAPI Specification for Dynamics 365 Business Central, you can visit this link.
I hope this has been helpful.
Pingback: How to use the Query object as an API in Business Central - Ivan Singleton