Custom Filter Tokens is an interesting feature in Business Central, which allows us to add filter tokens in the form:
- TOMORROW
- YESTERDAY
- THISMONTH
- THISYEAR
- FISCALYEAR
- CHRISTMAS
In other words, Tokens are special words that resolve to one or more values, saving the user time without manually manipulating dates or navigating to other pages to find values to enter as filter criteria.
Creating the token word and the handler
For us to customize our own Token we have to subscribe to Codeunit 41 or Filter Tokens which contains all the necessary events to accomplish our goal.
Then I leave the list of events that we can use or subscribe to.
For more information on parameters and details, I leave the link to the documentation on Github
Example
For this Post, 3 demonstrative examples have been created, which are the following:
Top Sales Invoices Amount
The following code uses the ‘OnResolveTextFilterToken(TextToken: Text; var TextFilter: Text; var Handled: Boolean)‘ event.
Below is the list of Parameters used:
Parameters
TextToken (Text): The text token to resolve.
TextFilter (Text): The text to translate into a properly formatted text filter.
Handled (Boolean): Stores whether the operation was successful.
Note: Filter criteria will often contain symbols along with filter tokens. It is recommended that only the filter token you entered is modified and the rest of the filter string is preserved afterward.
The functionality has been created through the Token: %TOPINV that allows returning the 5 sales invoices with the highest amount.
Video 1
In this first video we can see how %TOPINV works
Last Five Posted Invoice
Similar to the previous code, in the following code the ‘OnResolveTextFilterToken‘ event has been used again, but this time the idea is to have a token that allows us to obtain, for example, the last 5 sales invoices according to their Posting Date.
The token used is %LASTFIVE
Video 2
In the following video we can see that when using the %LASTFIVE token, the last 5 documents ordered by Posting Date are listed.
OnResolveDateFilterToken
Now, we have jumped to the procedure OnResolveDateFilterToken(DateToken: Text; var FromDate: Date; var ToDate: Date; var Handled: Boolean) event, this is designed to extend date-related filters.
Parameters
DateToken (Text): The date token to resolve, for example: “Summer”.
FromDate (Date): The start date to resolve from DateToken that the filter will use, for example: “01/06/2019”. Passed by reference by using VAR keywords.
ToDate (Date): The end date to resolve from DateToken that the filter will use, for example: “31/08/2019”. Passed by reference by using VAR keywords.
Handled (Boolean): Stores whether the operation was successful.
For this, a Case has been created that allows us to create simultaneous Tokens, for this example some have been created that allow us to more easily filter dates, thus saving the user time.
Video 3
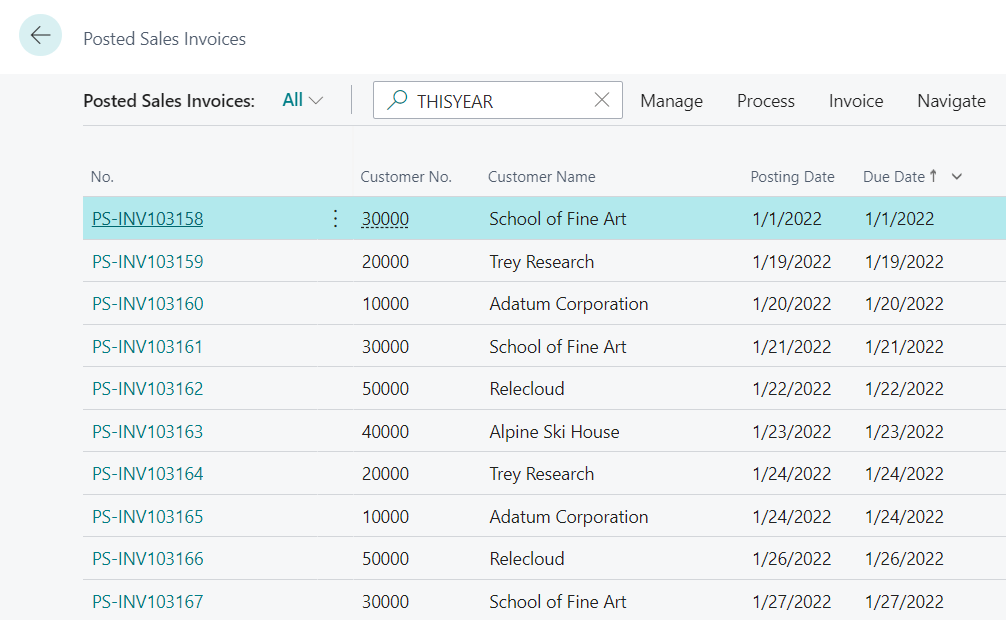
In the video I will show how the THISYEAR Token works.
Note: Keep in mind that the tokens created in this event do not need the ‘%‘ character.
In the video, you can see that if we use the token directly in the Postin Date and click outside, it is immediately replaced by the filter: 01-01-2022..12-31-2022
Important considerations
Note that these events can be triggered from any human task in Business Central.
To improve usability and avoid affecting search performance, consider avoiding the following:
- Show pages, dialogs, or any interactive user interface.
- Implement tokens that are only relevant for some business tasks.
- Implement tokens whose resolution takes a long time, such as searching for records in large tables or obtaining data through web services. or that are complex or unreliable and that can generate errors.
Conclusion
Thanks to the customization of Token you can create incredible fully personalized searches that would help save time for customers.
In the following Github link I share the code used.
If you liked this post share it.
I hope it helped you.
Finally, I leave the link of my previous post “How to Create and use the Control Add-In in Business Central” in case you haven’t seen it yet.