Hello, today you want to share something that I found quite interesting and it’s how to send or receive notifications from Business Central to Telegram.
I initially thought of doing this project with Azure Functions, which I’m sure is easier to create, but to do something different, I thought of doing it in Asp.net.
This project focused on creating queries for Items in Business Central from telegram, but you can create notifications from Workflows or even create Sales Order or Post documents, as examples.
Below I share a screenshot of the final result.

The project will be divided into 3 parts:
- 1) Configuring the Telegram Bot.
- 2) Creating the WebServices in Busines Central.
- 3) Creating the ASP.net project.
Below are the links to the projects that were created:
–Business Center.
–AzureFunctions.
Telegram Bot
To configure the telegram bot I base myself on the following website:
https://core.telegram.org/bots/api
The first thing I did was create the bot in telegram as follows:
1) We look for the telegram bot called botfather

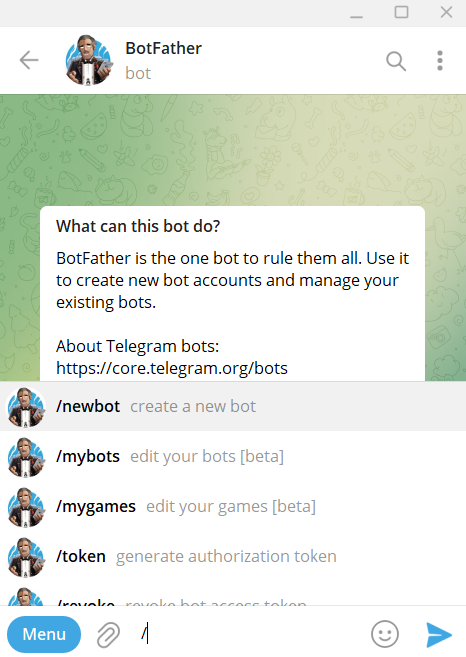
2) We write the command /newbot and then the name of our bot.

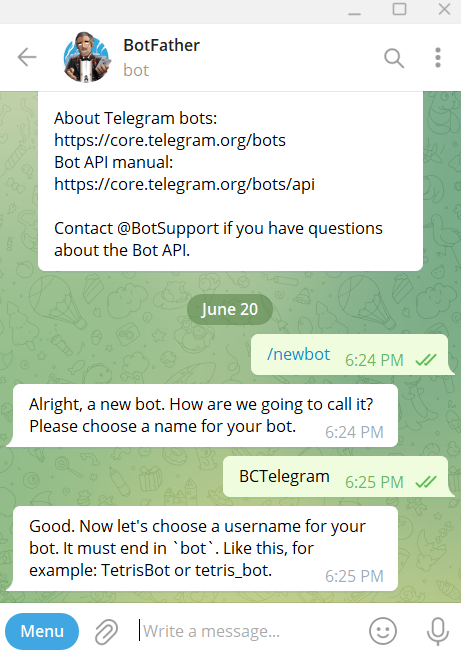
3) We write a username

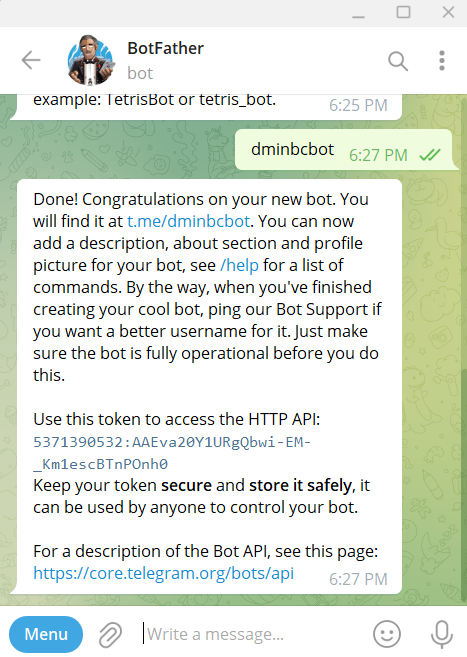
4) We copy the telegram token that we will use in the Asp.net project
5) Optionally, we can test in postman that our bot is well configured as follows:
When executing we will obtain something similar to this:

Business Central
This is the simplest project, it consists of creating our web services. On this occasion I decided to use a codeunit.
codeunit 50550 WebServices | |
{ | |
trigger OnRun() | |
begin | |
end; | |
procedure Ping(): Text | |
begin | |
exit('Pong'); | |
end; | |
procedure GetItemsToJson(jsontext: Text): Text | |
var | |
Item: Record Item; | |
JsonInput: JsonObject; | |
JSONProperty: JsonObject; | |
ItemNoToken: JsonToken; | |
BigText: Text; | |
begin | |
JsonInput.ReadFrom(jsontext); | |
if not JsonInput.Get('No', ItemNoToken) then begin | |
Error('Error reading Item No'); | |
end; | |
Item.SetRange("No.", ItemNoToken.AsValue().AsCode()); | |
if not Item.FindLast() then begin | |
JSONProperty.Add('Error', StrSubstNo('Item No. %1 not found', ItemNoToken.AsValue().AsCode())); | |
JSONProperty.WriteTo(BigText); | |
exit(BigText); | |
end; | |
JSONProperty.Add('No', Item."No."); | |
JSONProperty.Add('Description', Item.Description); | |
JSONProperty.Add('UnitPrice', Item."Unit Price"); | |
JSONProperty.Add('UnitCost', Item."Unit Cost"); | |
JSONProperty.Add('UnitOfMeasure', Item."Base Unit of Measure"); | |
JSONProperty.WriteTo(BigText); | |
exit(BigText); | |
end; | |
} |
Where I will publish it as a web services and consume it as an Odata.
For more information on how to achieve the above, check this Microsoft link or the link of this previous post where I specify in more detail how to achieve it.

ASP.NET
This project will function as a bridge between Business Central and the Telegram Bot.
To get started, we’ll create an ASP.net project using the Asp.net Core Web API template.

We put a name.

We use .NET 6 as framework

Once we have created it, we will have something similar to the following image, where the first thing we will do is delete the default “hello world” called Weather Forecast.

We install the following Nuget, the most important Telegram Bot.

Share Proyect
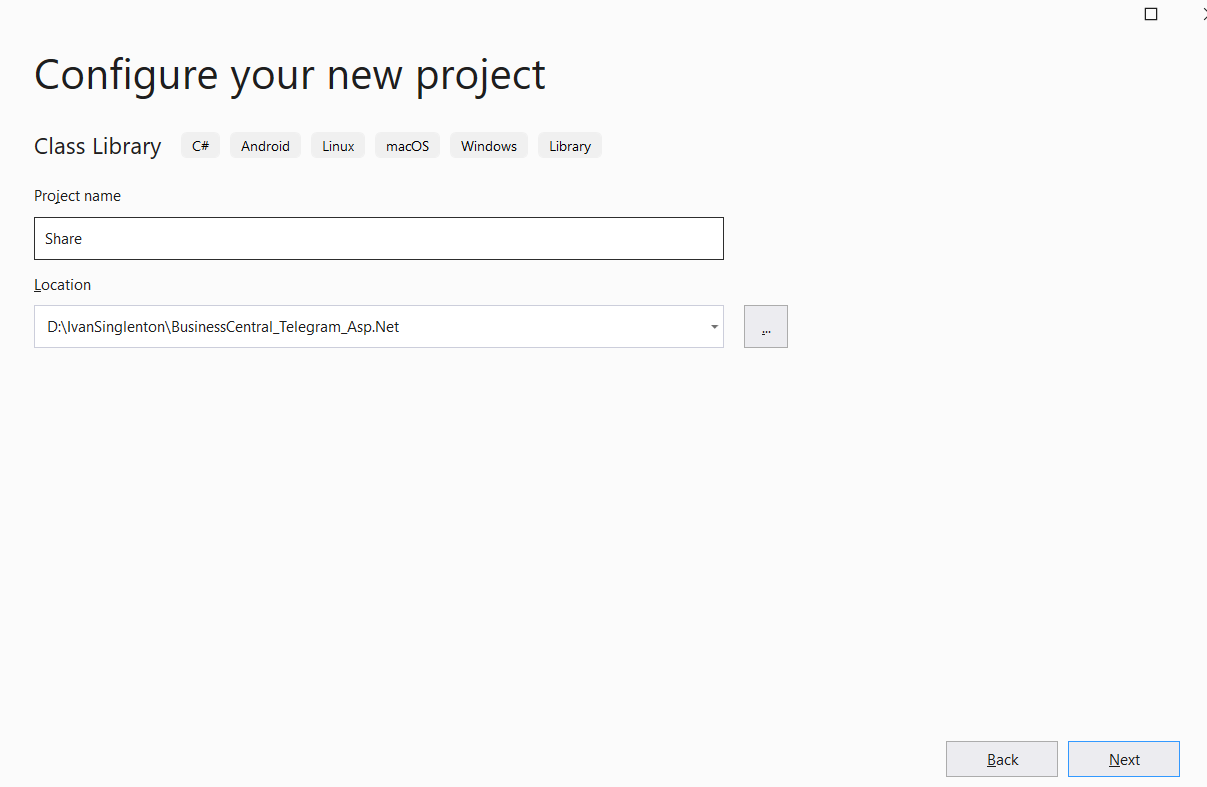
We add a new project called Share

We create a new project of type Class Library.

We put Share, because it will cut across our solution. Where we will have all our models and services that we will use in the Asp.net project.

Models
ConfigurationsValues:
This model will serve to read all our token and secret of the application.
The ones we will use are related to Oauth2, webservice call and Telegram token.
Note:
In the Azure portal, in Configuration, we must store our variables so that the project runs correctly when we publish it.

Item
The Item class is where we will use it as a model to signalize and deserialize the entry and exit of the Business Central web services.
Request BC
We use this class to store the “Item No” request in the jsonText.
Response Model:
The response model is a generic model that will allow us to store the response of our API call specifically in the method that connects to BC called GetDataFromBC, if it is successful in the Result property we will store our Json with the list of elements.
Output
With this class we will deserialize the output of requests to Business Central.
Error Model
In the event that our product is not found, we will use the following class to undo the exit from Business Central.
Services
I had already used this service for a similar purpose in the project I did on how to connect Business Central with a mobile application made in Xamarin, the difference is that in this project it was slightly modified to pass parameters to our BC web services.
Asp.Net
Program
The first thing we will modify when we create our ASP.net project is the Program.cs.
The specific parts that were added to the project have been encapsulated with the following comment: “//Added for telegrambot“
using BusinessCentral_Telegram_Asp.Services; | |
using Shared.Models; | |
using Telegram.Bot; | |
var builder = WebApplication.CreateBuilder(args); | |
// Add services to the container. | |
builder.Services.AddControllers(); | |
// Learn more about configuring Swagger/OpenAPI at https://aka.ms/aspnetcore/swashbuckle | |
builder.Services.AddEndpointsApiExplorer(); | |
builder.Services.AddSwaggerGen(); | |
//Added for telegrambot | |
var botConfig = builder.Configuration.GetSection("ConfigurationsValues").Get<ConfigurationsValues>(); | |
builder.Services.AddControllers().AddNewtonsoftJson(); | |
builder.Services.AddHostedService<ConfigureWebhook>(); | |
builder.Services.AddHttpClient("tgwebhook").AddTypedClient<ITelegramBotClient> | |
(httpClient => new TelegramBotClient(botConfig.TelegramToken, httpClient)); | |
builder.Services.AddScoped<BCServices>(); | |
builder.Services.AddCors(); | |
//Added for telegrambot | |
var app = builder.Build(); | |
// Configure the HTTP request pipeline. | |
if (app.Environment.IsDevelopment()) | |
{ | |
app.UseSwagger(); | |
app.UseSwaggerUI(); | |
} | |
app.UseHttpsRedirection(); | |
//app.UseAuthorization(); | |
//app.MapControllers(); | |
//Added for telegrambot | |
app.UseRouting(); | |
app.UseCors(); | |
app.UseEndpoints(endpoints => | |
{ | |
var token = botConfig.TelegramToken; | |
endpoints.MapControllerRoute(name: "tgwebhook", | |
pattern: $"bot/{token}", | |
new { controller = "api/BC", action = "Post" }); | |
endpoints.MapControllers(); | |
}); | |
//Added for telegrambot | |
app.Run(); |
In this, we have configured the “ITelegramBotClient” interface that we will use to access the methods that will communicate with the Telegram bot, our BCServices, and the ConfigureWebhook service that will initialize our Telegram Bot, and finally our Endpoint.
In the following Link there is more information and examples of how to connect from .NET to the telegram bot.
AppSettings.json
In this JSON we will configure all the global variables that we will deserialize in our previously shown “ConfigurationsValues” class and handle all Outh2 and telegram bot tokens.
Additionally, the HostAddress variable has been added, which will be the URL address once we have published our project.
This address is used to configure the bot which will be explained further down in this post.
{ | |
"Logging": { | |
"LogLevel": { | |
"Default": "Information", | |
"Microsoft.AspNetCore": "Warning" | |
} | |
}, | |
"ConfigurationsValues": { | |
"HostAddress": "https://yourwebsite.azurewebsites.net/api/BC", | |
"Clientid": "YourClientid", | |
"Tenantid": "YourTenantid", | |
"ClientSecret": "YourClientSecret", | |
"TelegramToken": "YourTelegramToken", | |
"CompanyID": "YourCompanyId", | |
"EnvironmentName": "YourEnvironmentName" | |
}, | |
"AllowedHosts": "*" | |
} |
Configure Webhook
This class, through the StartAsync method, configures the setWebhook according to the HostAddress and eliminates it when the application stops in StopAsync.
On the following website there is more detailed information on this method.
public class ConfigureWebhook : IHostedService | |
{ | |
private readonly ILogger<ConfigureWebhook> _logger; | |
private readonly IServiceProvider _services; | |
private readonly ConfigurationsValues _botConfig; | |
public ConfigureWebhook(ILogger<ConfigureWebhook> logger, | |
IServiceProvider serviceProvider, | |
IConfiguration configuration) | |
{ | |
_logger = logger; | |
_services = serviceProvider; | |
_botConfig = configuration.GetSection("ConfigurationsValues").Get<ConfigurationsValues>(); | |
} | |
public async Task StartAsync(CancellationToken cancellationToken) | |
{ | |
using var scope = _services.CreateScope(); | |
var botClient = scope.ServiceProvider.GetRequiredService<ITelegramBotClient>(); | |
// Configure custom endpoint per Telegram API recommendations: | |
// https://core.telegram.org/bots/api#setwebhook | |
// If you'd like to make sure that the Webhook request comes from Telegram, we recommend | |
// using a secret path in the URL, e.g. https://www.example.com/<token>. | |
// Since nobody else knows your bot's token, you can be pretty sure it's us. | |
var webhookAddress = @$"{_botConfig.HostAddress}"; | |
_logger.LogInformation("Setting webhook: {WebhookAddress}", webhookAddress); | |
await botClient.SetWebhookAsync( | |
url: webhookAddress, | |
allowedUpdates: Array.Empty<UpdateType>(), | |
cancellationToken: cancellationToken); | |
} | |
public async Task StopAsync(CancellationToken cancellationToken) | |
{ | |
using var scope = _services.CreateScope(); | |
var botClient = scope.ServiceProvider.GetRequiredService<ITelegramBotClient>(); | |
// Remove webhook upon app shutdown | |
_logger.LogInformation("Removing webhook"); | |
await botClient.DeleteWebhookAsync(cancellationToken: cancellationToken); | |
} | |
} |
BCController
This controller is the one that is configured to receive the messages that are sent to the telegram bot.
namespace BusinessCentral_Telegram_Asp.Net.Controllers | |
{ | |
[Route("api/[Controller]")] | |
public class BCController : Controller | |
{ | |
[HttpPost] | |
public async Task<IActionResult> Webhook([FromServices] BCServices _BCServices, [FromBody] Update _update) | |
{ | |
Response<string> response = await _BCServices.ConnectToBC(_update); | |
if (response.IsSuccess) | |
return Ok(); | |
else | |
return BadRequest(response.Message); | |
} | |
} | |
} |
ConnectToBC
This service will be in charge of reading the message sent to the bot, separating the command from the parameters, and subsequently calling the BC service to consult the requested information.
public async Task<Response<string>> ConnectToBC(Update update) | |
{ | |
_logger.LogInformation("ConnectToBC: Receive message type: {MessageType}", update.Type); | |
if (_botConfig.TelegramToken == null) | |
{ | |
return new Response<string>() | |
{ | |
IsSuccess = false, | |
Message = "Please set the TelegramToken." | |
}; | |
} | |
if (update.Type == UpdateType.Message) | |
{ | |
if (update.Message.Entities != null) | |
{ | |
if (update.Message.Entities[0].Type == MessageEntityType.BotCommand) | |
{ | |
string[] Parameters = update.Message.Text.Split(" "); | |
TelegamCommand request; | |
if (Parameters.Length == 1) | |
{ | |
request = new() | |
{ | |
CommandName = Parameters[0], | |
Parameter = null | |
}; | |
await _botClient.SendTextMessageAsync(update.Message.Chat.Id, $"Command: {request.CommandName} \n" | |
+ $"Parameter: Empty"); | |
} | |
else if (Parameters.Length >= 2) | |
{ | |
request = new() | |
{ | |
CommandName = Parameters[0], | |
Parameter = Parameters[1] | |
}; | |
BCApiServices apiServices = new(_botConfig); | |
switch (request.CommandName) | |
{ | |
case | |
"/getitem": | |
return await GetItem(_botConfig, _botClient, update, request, apiServices); | |
case | |
"/getcustomer": | |
break; | |
case | |
"/salesorders": | |
break; | |
default: | |
request.CommandName = "Unknow"; | |
break; | |
} | |
await _botClient.SendTextMessageAsync(update.Message.Chat.Id, $"Command: {request.CommandName} \n" | |
+ $"Parameter: {request.Parameter}"); | |
} | |
return new Response<string>() | |
{ | |
IsSuccess = true, | |
Message = "Command executed successfully." | |
}; | |
} | |
} | |
await _botClient.SendTextMessageAsync(update.Message.Chat.Id, $"Echo Message: {update.Message.Text}"); | |
} | |
return new Response<string>() | |
{ | |
IsSuccess = true, | |
Message = "Command executed successfully." | |
}; | |
} |
GetItem
In this method we serialize the query and send it to the GetDataFromBC service, in case of success we will respond to the Telegram Bot with the requested information, in case of no success we will also respond with the error message.
private async Task<Response<string>> GetItem( | |
ConfigurationsValues configValues, | |
ITelegramBotClient _botClient, | |
Update Rec, | |
TelegamCommand request, | |
BCApiServices apiServices) | |
{ | |
_logger.LogInformation("GetItem: Receive message type: {MessageType}", Rec.Type); | |
try | |
{ | |
RequestBC requestBC = CreateItemRequest(request); | |
Response<object> Response = await apiServices.GetDataFromBC(configValues.GetItemsToJson, requestBC); | |
if (Response.IsSuccess) | |
{ | |
var ResultBC = JsonConvert.DeserializeObject<Ouput>(Response.Message); | |
var ItemBC = JsonConvert.DeserializeObject<Item>(ResultBC.value); | |
if (string.IsNullOrEmpty(ItemBC.No)) | |
{ | |
var ErrorMessage = JsonConvert.DeserializeObject<ErrorModel>(ResultBC.value); | |
await _botClient.SendTextMessageAsync(Rec.Message.Chat.Id, $"Error: {ErrorMessage.Error}"); | |
} | |
else | |
{ | |
await _botClient.SendTextMessageAsync(Rec.Message.Chat.Id, | |
$"Item No: {ItemBC.No} \n" + | |
$"Description: {ItemBC.Description} \n" + | |
$"UnitPrice: {ItemBC.UnitPrice} \n" + | |
$"UnitOfMeasure: {ItemBC.UnitOfMeasure}"); | |
} | |
} | |
else | |
{ | |
await _botClient.SendTextMessageAsync(Rec.Message.Chat.Id, $"Error getting the data {Response.Message}"); | |
} | |
return new Response<string>() | |
{ | |
IsSuccess = true, | |
Message = "Command executed successfully." | |
}; | |
} | |
catch (Exception ex) | |
{ | |
_logger.LogInformation("GetItem: Exception message type: {Message}", ex.Message); | |
await _botClient.SendTextMessageAsync(Rec.Message.Chat.Id, $"Error getting the data {ex.Message}"); | |
return new Response<string>() | |
{ | |
IsSuccess = false, | |
Message = $"Exception: {ex.Message}" | |
}; | |
} | |
} |
Create Item Request
The auxiliary method that performs the request.
private RequestBC CreateItemRequest(TelegamCommand request) | |
{ | |
_logger.LogInformation("CreateItemRequest: ItemNo: {Message}", request.Parameter); | |
Item ItemRequest = new() | |
{ | |
No = request.Parameter | |
}; | |
string body = JsonConvert.SerializeObject(ItemRequest); | |
RequestBC requestBC = new() | |
{ | |
jsontext = body | |
}; | |
return requestBC; | |
} |
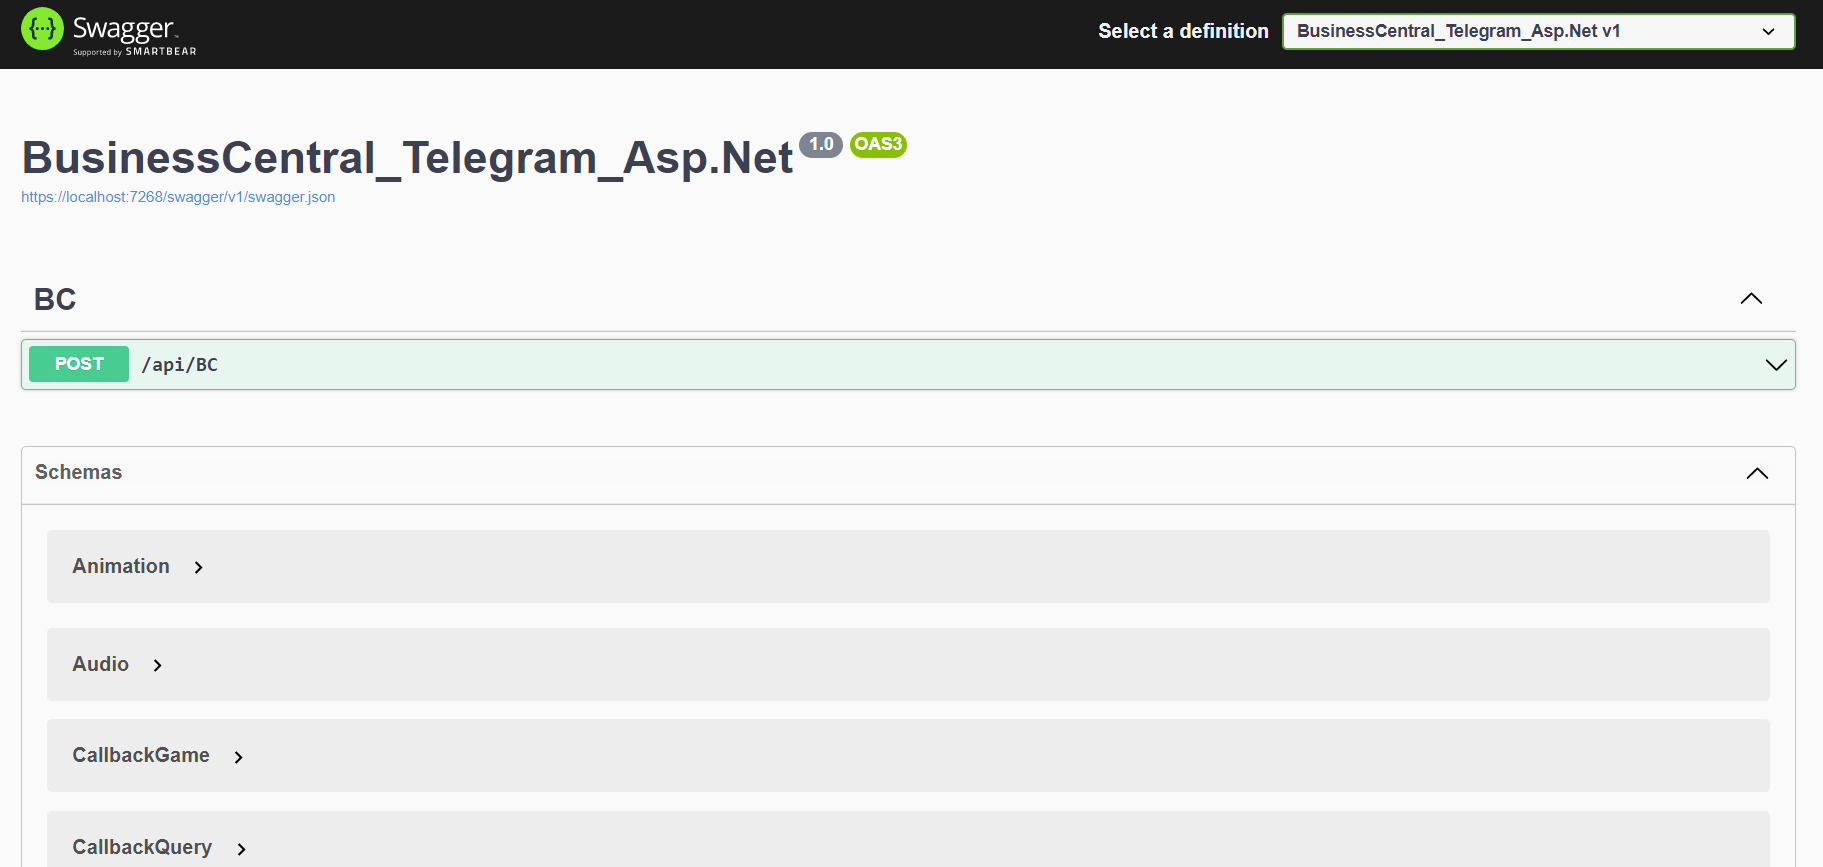
When we finish our project, it should have the following structure:

And when we execute it, a view similar to the following:

Tests
Postman
Next, I show how we call our BC controller from the postman.

Body.json
{ | |
"update_id": 134515106, | |
"message": { | |
"message_id": 89, | |
"from": { | |
"id": 6818096, | |
"is_bot": false, | |
"first_name": "Ivan L", | |
"username": "username", | |
"language_code": "en" | |
}, | |
"chat": { | |
"id": 6818096, | |
"first_name": "Ivan L", | |
"username": "username", | |
"type": "private" | |
}, | |
"date": 1655590847, | |
"text": "/getitem 1896-S", | |
"entities": [ | |
{ | |
"offset": 0, | |
"length": 8, | |
"type": "bot_command" | |
} | |
] | |
} | |
} |
Video 1:
Published Application
Once we have the application published, we can check the status of our webhook with the following request in postman:
More information at this link

Video 2:
That is all. Possibly later I will do this same post with Azure Functions.
I hope it has helped you, if you liked it you can share.
Pingback: How to read files via SFTP in Business Central - Ivan Singleton